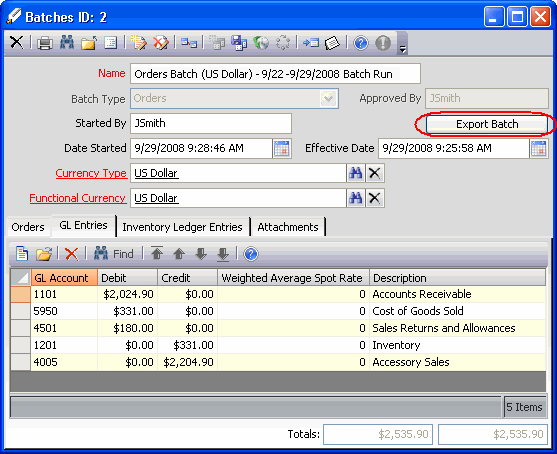
If the user did not create the general ledger (GL) export file during the wizard process, the file may be exported from the Batches service at a later point in time.
Follow these steps:
- Open the appropriate general ledger batch record from the Batches service to begin the export process.
- All of the standard header information including name, general ledger batch type, who started the general ledger batch, who approved the general ledger batch, date started, effective date, and currency type is displayed on this record.
- Each of the records included in the general ledger batch is displayed in the list on the Orders tab if it is a general ledger batch of orders, on the Payments tab if it is a general ledger batch of payment records, or on the Scheduled Transactions tab if it is a general ledger batch of scheduled transaction records.
- When generating a GL batch export file, users can include Accounting Period data in that file, if desired.
- In the Export Batch prompt, select the Include Accounting Period Data in Export File option to include a batch's Accounting Period ID and the Accounting Period Name.
If this option is not selected, the accounting period is not included.
By default, the Include Accounting Period Data in Export File option is cleared. If you want to have this option selected by default, an administrator can set the Batches entity's IncludeAccountingPeriod entity attribute from 0 to 1.
- Verify the GL account information on the GL Entries tab. This tab displays the general ledger account information, including a description and a list of the Debit and Credit account entries.
- Export the general ledger batch into a file that can be used by an external GL accounting system by clicking the Export Batch button (circled in the figure above).
- In the Enter Date dialog box, modify the Effective Date for the batch, if necessary. Click OK to continue.
In the Save As dialog box, choose the directory location for the export destination. The name is automatically generated, but may be modified for clarity.
Note Concerning Default Export Type
In the Save As dialog, the default file type is tab delimiter (.txt). However, an administrator can modify this default value by modifying the configurable attribute found on the Batch entity. Below is a description of the attribute:
DefaultExportType: The Batch Export save dialog can save a batch file in two formats: comma separated value (CSV) or tab-delimited. While you can save a particular file in either format, this attribute determines which format is selected by default. A value of CSV sets the default to the CSV type. A value of TXT sets the default to the tab-delimited type.- Select Save. If you selected an existing batch file that already appears in the specified location, choose from the following options when prompted:
- Yes: Appends the batch information to the current file.
- No: Overwrites the current file with the batch information.
- Cancel: Cancels the current export option.
- After selecting Save, a dialog box displays stating the location and file name of where the General Ledger entries have been written. Click OK to close the message.
