Creating a Meeting Type Class
Aptify supports creating seminar-based Classes records that leverage Meeting Management features. For example, if you hold single-day seminars at hotels with different speakers several times a year, the Courses record for this type of learning experience is best represented by setting the Product Type field to Meeting rather than Class.
Follow these steps to add a seminar-based Class that also creates a Meeting in Aptify:
Open the Course that you would like to add a class To.
These instructions assume that the course you opened has the Product Type field set to Meeting. See Creating Courses for details.
- On the Classes Tab, select the New Record button.
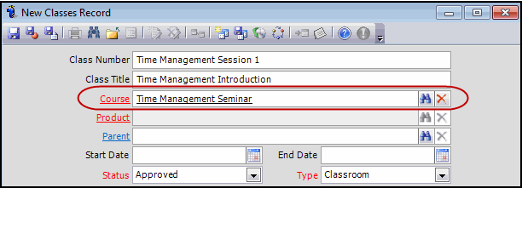
- A new Classes Record is opened and the Course field is populated with the name of the Meeting record.
- A new Classes Record is opened and the Course field is populated with the name of the Meeting record.
- Enter the Class Number and Class Title.
- Verify that the Course (required) is populated with the name of the Course it is being created under.
- Specify a Parent, if desired.
- When a Parent Class is specified, that parent class's product automatically becomes the parent of the current class's product.
- The Parent field also appears on the Meeting Info > Product Details > Product Info tab, but it is disabled since you cannot modify it there.
- Specify Start and End Dates/Times for the class.
- The start and end dates flow down from the Class to the Meeting automatically.
- The start and end dates flow down from the Class to the Meeting automatically.
- Select the Status for the new Classes record.
By default, the field is set to Approved.
This field does not impose validation for class registrations (in other words, the system does not prevent a user from registering a student for a class with a status of Pending, Rejected, Cancelled, or Complete). However, Web users can only register for classes with a status of Approved on an e-Business website.
- Select the Type for the Class, this field specifies the environment where the class will be held.
- The default type is Classroom.
- The default type is Classroom.
- Verify the Coordinator, for the class.
- Click the Meeting Info tab.
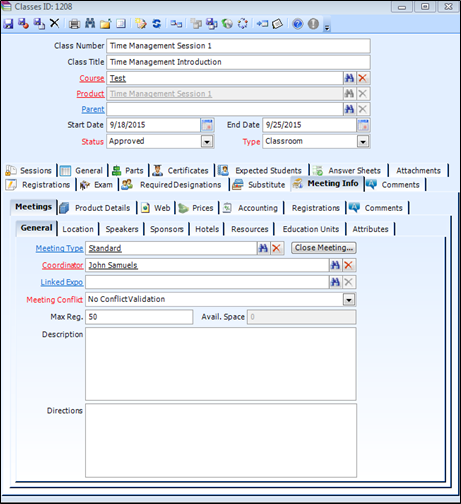
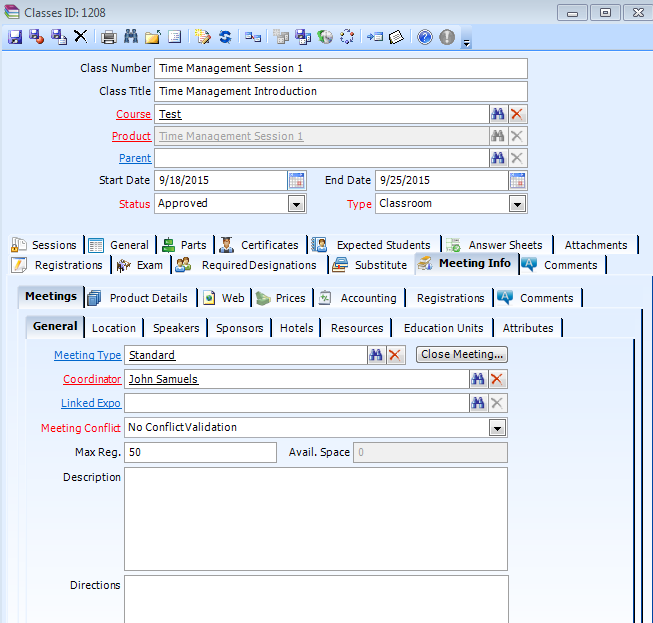
- The Meeting Type, Coordinator, Meeting Conflict, and Max Reg. fields are pre-populated.
- The Meeting Type, Coordinator, Meeting Conflict, and Max Reg. fields are pre-populated.
Ensure that values for the Meeting Type and Coordinator fields are correct.
- In the Meeting Conflict field, select the value for the preferred approach to handling checking whether a person is already registered for another meeting or session that occurs at the same time as this class:
- No Conflict Validation: (default) The system does not perform a conflict check when a person registers for this meeting.
- Conflict Warning: The system checks for conflicting meeting registrations and displays a warning message. A user can override this setting to ignore the conflict and create the meeting registration.
- Conflict Prohibited: The system checks conflicting meeting registration and displays a warning message. However, the user cannot override this setting to ignore the conflict.
In the Max Reg. field, set the maximum number of people (registrants) who can register for this meeting.
- Meeting space is managed by Aptify’s Inventory
- This field is for tracking purposes only
- Configure the other meeting-related settings for this class, which includes:
- Location: Specify the venue and address of the where the class will take place. This also includes a specific meeting room, if applicable.
- Speakers: Identify the speakers and instructors for the class.
- Sponsors: Identify any third parties that are sponsoring this class to help subsidize the cost.
- Hotels: If applicable, enter any information about hotels local to the class location and their rates or specials.
- Resources: Identify any resources that are required for the class.
- Education Units: Define how many units participants can earn attending this class.
- Attributes: Identify any additional class details, as applicable. The use of these attributes will vary from organization to organization.
- Web: On the Web tab, you can enable this class so it appears on an e-Business website and defines the class's web details.
- Prices: Define the prices you want to charge for this class.
Accounting: Define whether this class will be taxable and specify a future revenue recognition date, if applicable.
For more information about specifying the details for a meeting, see Managing Meeting Products. For more information about setting up products, see Managing Basic Products.
- On the Meetings > General tab, verify the meeting logistic details, such as the Location, Speakers, Sponsors, etc...
- These details will all flow down from the Meeting the class is linked to, however, they can be created separately on the new Classes record.
- These details will all flow down from the Meeting the class is linked to, however, they can be created separately on the new Classes record.
- Save the Classes record.
Copyright © 2014-2019 Aptify - Confidential and Proprietary


