Using the Aptify POS App
This topic describes how to use the Aptify POS app.
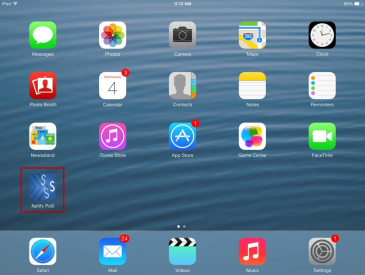
- Open Aptify POS app by tapping on the Aptify PoS icon.
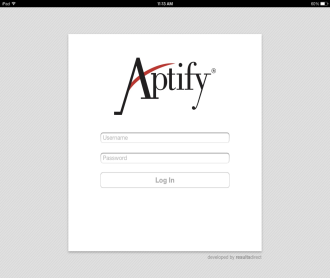
Log in using a Windows domain user name or SQL user account, depending on your Aptify user configuration.
Note
If you are logging in using a Windows doman user name, you do not need to enter the domain name as part of the log in (e.g., enter the user name as POSUser, not POSUser@aptify.com or Aptify\POSUser).
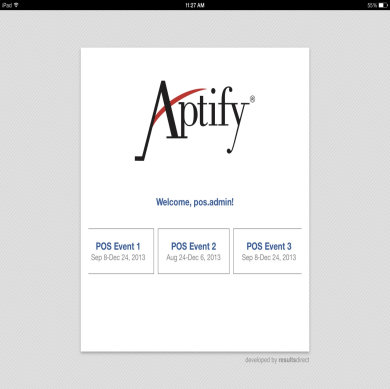
- Select the event from the list of active POS Events.
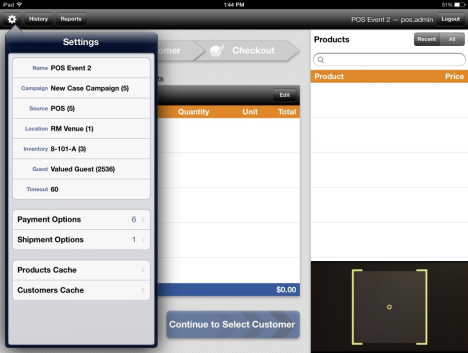
- Open the POS settings to verify Event details.
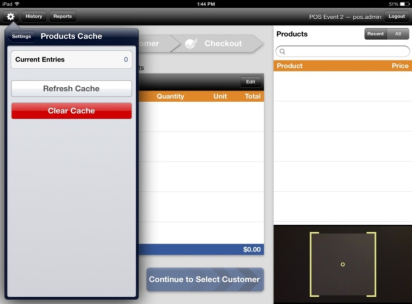
- Download the Products Cache and the Customers Cache by tapping on the Refresh Cache button for both caches.
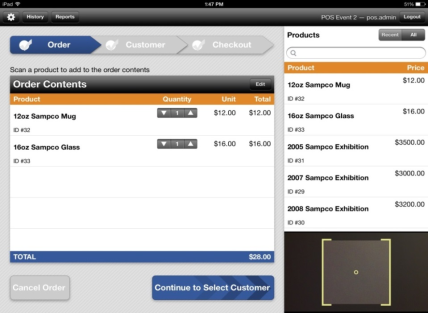
By default, the maximum number of customers and products cached are 500 each. This number can be modified by changing the number in one of the app key settings (<add key="Aptify.Services.General.TopRecord" value="5000"/>) in the webconfig file for the SOA Framework. Setting the number too high may negatively impact system performance. - Add products for the order. Products can be added by searching or by scanning. When scanning a product, you can use either a wireless handheld scanner (Socket Mobile CHS 7Xi) or the iPad's camera.
- UPC-A and EAN13 barcodes are supported by default.
- Scanner matches the number encoded on the barcode with the barcode field of the product. If the barcode field is null, it will match the encoded number, with the ISBN/ISSN field of the product. You can create a product barcode for free using www.barcode-generator.org.
- Refer the Socket Mobile Quick Start Guide provided by Aptify, to connect with Socket Mobile CHS 7Xi (The guide provided by Aptify is the truncated version of the Quick Start Guide that comes with the scanner. It includes only the relevant information/steps required for using the scanner with Aptify POS. Use this link to view the complete guide: http://www.socketmobile.com/pdf/data-collection/chs-7x_qs.pdf.)
- Scanner should be disconnected from an iPad by using Forget the Device option, before connecting it to another iPad.
If the scanner is unable to identify UPC-A barcodes, scan the command barcode (UPC fix) listed on the last page of the Socket Mobile Quick Start Guide (provided in the setup folder).
Note
For best results, Aptify recommends using the Socket Mobile CHS 7Xi handheld scanner over the iPad's camera.
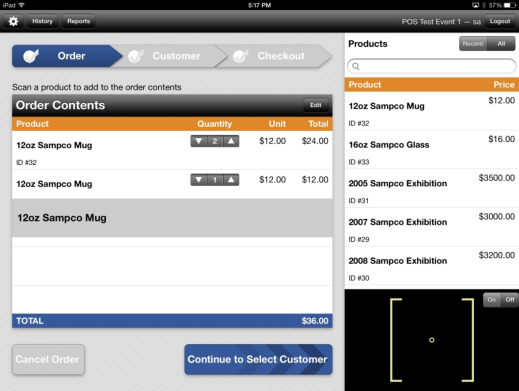
Same product can be added to multiple order lines, for business cases where you want to give special discounts like Buy2Get1Free or Buy1andGet50%OffOnSecond etc. To add same product to multiple order lines, add multiple quantities of the product and then hold-drag-and-drop order line to the next order line. This removes one quantity of the product from the first order line and creates a second order line with one quantity.
Tap on Continue to Select Customer to add the customer to the order.
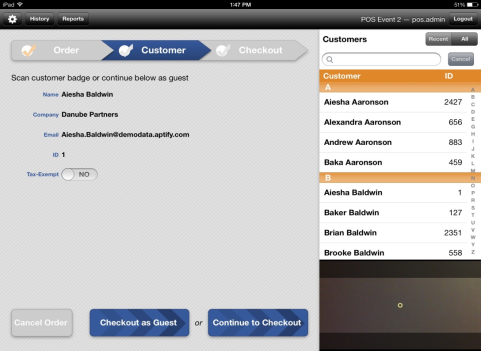
- Select the customer from the list of event attendees. Customer can be selected by searching, browsing or badge scanning. When scanning a person's badge/barcode, you can use either the wireless handheld scanner (Socket Mobile CHS 7Xi) or the iPad's camera.
- Code39 and PDF417 barcodes are supported by default. QR codes are not supported.
- Code39 barcode should have the PersonID encoded. The PersonID should be six digits long. If a person has a PersonID smaller than 6 digits, then encode his PersonID with required number of 0s in the beginning. E.g. For PersonID=12; number 000012 should be encoded on the barcode. You can try generating Code39 barcodes for free on www.barcode-generator.org.
- PDF417 barcode is a 2D barcode that encodes a caret-separated (^) list of tokens, the last of which should be the PersonID. For example, Person Name: Aiesha Aaronson; Person's Company: Danube Partner; PersonID: 2427; PDF417 should have this value encoded: AieshaAaronson_DanubePartner^2427. You can try generating PDF417 barcode for free, on http://www.racoindustries.com/barcodegenerator/2d/pdf417.aspx.
- Tax Exempt option can be selected to make a tax exempt sale. Please note that Tax Exempt selection cannot be modified by coming back to this page, once the User has gone to the Checkout Page.
- Checkout as Guest can be selected to either checkout as generic guest or to create a new persons record.
- Tap on Continue to Checkout or Checkout as Guest to move to the Checkout Page. Once the User is on the checkout Page, he can still go back to Order Page or Customer Page to make changes to the product selection, or to the attendee selection.
- Checkout Page allows you to modify following options:
- Payment Information: User can pay using Cash, Check, Credit Card, or Referential Transaction Credit Cards.
- Cash Payment: Select the Cash Payment option and select Complete Order. There is an option to enter the cash amount given by the customer, and App will calculate and display the change amount that needs to be returned to the customer.
- Check Payment: Select the Check Payment option, enter the Check Number and select Complete Order. As a best practice, you should note down the POS Order Number and Customer's PersonID on the back of the check. Information regarding the POS Order Number and PersonID is available on the History page.
- Credit Card Payment: Select Credit Card Payment option and scan the Credit Card using IDTECH iMag Pro Credit Card Scanner, or by manually entering the credit card number and expiration date. Also, enter the CVV number if that is a requirement from the backend to process payments. Then select Complete Order button, and it will ask for customer signature (can be done using finger or stylus). Verify and accept the signature to complete the order.
- Price Override: Aptify Point Of Sale allows the user to override price based on the configuration/setting of the POS Event and the product. If Price override is allowed for the POS Event and for the Product, then the user can modify the product price.
- Select the Edit button and then you can override the price of the product if all conditions/settings are satisfied.
- Tap on Done button once you have made the update to the price.
- Select Update Cart to finalize and update the shopping cart with new price selection.
- Price override can be done to any value (From -$99999.99 to $99999.99) as long as the backend product properties allow that change.
- Order line changes: Aptify Point of Sale User can change the product quantity and remove the order lines on the checkout page.
- Select the Edit button and then you can change the product quantity of each order line.
- Tap on Done button once you have made the update to the quantity.
- Select Update Cart to finalize and update the shopping cart with new product quantity.
- Any quantity of the product can be selected (From 0 to 999) as long as the backend allows.
- Quantity can be changed to 0 to delete the order line.
- Pay-and-Carry Order or To-be-Shipped Order Selection: Aptify Point of Sale User can select the Order to be a Pay-and-Carry Order (when the product is handed over to the customer at the point of sale) or a To-be-Shipped Order (when the order is to be shipped to the customer at a specified shipping address).
- Tap on Ship This Order toggle, if you want the order to be a To-Be-Shipped order. Else the order will be considered as a Pay-and-Carry Order. Shipping address for all Pay-and-carry orders is the Event locations address.
- Tapping on Ship This Order toggle, will let the user see the shipping address for the order and will also let the user to select the shipping type to be used for shipping the order.
- Select Update Cart to finalize the order with the ship type selection.
- Ship Type for all the Pay-and-Carry orders is going to be the default value that is set in the POS Orders entity configuration.
- Billing Address and Shipping Address Selection: Aptify Point of Sale User can view the preferred billing and shipping address of the person, and can also update these addresses for a particular order.
- Billing Address and Shipping Address for the order can be added by tapping on Update Existing or Add New buttons. Both the buttons have exactly same functionality.
- Shipping address for Pay-and-Carry Order cannot be changed, and will be set as the Event's location address.
- United States will be assumed as the Country, if no country is added from the POS app.
- Select Update Cart to finalize the order with the new/edited shipping/billing address.
- Guest Checkout Options: Aptify Point of Sale User can complete an Order for a customer who is not available in the attendee list, using the Guest Checkout.
- Guest Checkout can be done under a generic person by not entering First Name, Last Name and emailID on the Checkout Page.
- New Persons record can be created for a customer using the Guest Checkout.
- Add First Name, Last Name and emailID of the person, and Update Cart, System will perform a duplicate check, and if there is a Persons record with the exact same information, then the system will checkout using that person. If there is no exact match then the system will create a new person with these fields and complete the order.
- Payment Information: User can pay using Cash, Check, Credit Card, or Referential Transaction Credit Cards.
Tap on Complete Order to finish the order.
Note
The Order Status would be set to Shipped, if all the products in the order do not require Shipping Fulfillment'. In other cases, all the orders will be left in the Taken state.
- The Email receipt screen will be displayed at order completion. This email receipt will use the message template set in the process flow configuration.
Related content
Copyright © 2014-2019 Aptify - Confidential and Proprietary
