Moving an Aptify Website
- admin (Deactivated)
Analytics
This topic describes the procedure to move an Aptify website from a source Aptify web server to a destination Aptify web server. This process can be used when a development website is complete and is ready to be tested.
This procedure assumes the following for the source and destination environments:
- Both are on the same Aptify release.
- Aptify Desktop client and web interface are fully functional in both.
Backup the source database and restore it on the destination database using the Microsoft SQL Server Management Studio.
If the web interface JavaScript files have been modified in the source environment, perform the following steps on the destination server:
This step is only required if JavaScript files have been modified, which is unlikely in a typical implementation. If you are skipping this step, proceed directly to Step 3.
Copy the Aptify sub-folder from the source Microsoft Internet Information Services (IIS) environment to the destination IIS environment.
The Aptify sub-folder is the location where the Aptify website files are stored on the web server. This location is specified in the Website Location field during the installation process. The default installation path for the Aptify sub-folder is c:\inetpub\wwwroot.
For the examples in the steps below, the name of the Aptify sub-folder is AptifyWeb533.
In the <Aptify Sub-folder>\AptifyServicesAPI folder, open the web.config file for editing.
- Update the URL to match the destination environment's URL at the four locations shown in the example.

- Save and close the web.config file.
- In the <Aptify Sub-folder>\Aptify\script\Aptify\configuration folder, open the Aptify.Framework.Configuration.External.js file for editing.
- Update the URL to match the destination environment's URL at the three locations shown in the example.

- Save and close the Aptify.Framework.Configuration.External.js file.
- In the <Aptify Sub-folder>\Aptify folder, open the web.config file for editing.
- Update the database name to match the destination environment's database name at the location in the example.

- Save and close the web.config file.
- In the <Aptify Sub-folder>\Aptify\ErrorContent folder, open the Error.txt file for editing.
- Update the URL to match the destination environment at the location in the example.
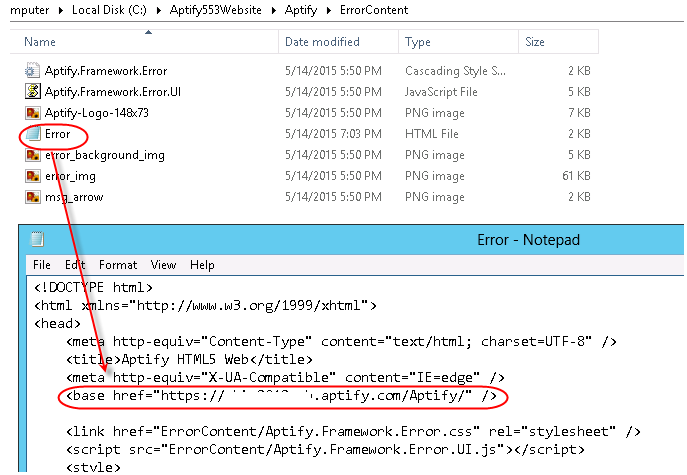
- Save and close the Error.txt file.
- Restore or import the Aptify Licenses as needed for the destination database/environment. See Licensing Aptify Products for more information.
Ensure that the ebizuser and aptifyuser accounts are in the destination system. If they are not available, use the User Administration wizard to add the ebizuser and aptifyuser accounts. See Creating User Accounts for details.
Ensure that these users are active.
- Open the Authentication Providers service, found under the Web Services application.
- Create an All Authentication Providers View in the service.

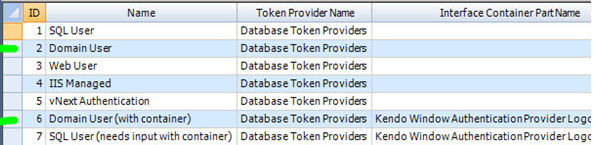
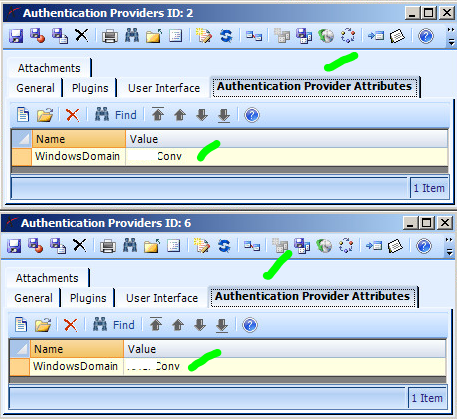
- Open this view, find the Domain User (ID 2) and Domain User (with container) (ID 6) records, and open these records
- Update these records to reflect the destination server.
Related content
Copyright © 2014-2019 Aptify - Confidential and Proprietary