Using the Aptify POS App Interface
This topic contains information about using the Aptify POS app interface.
Viewing the Order History
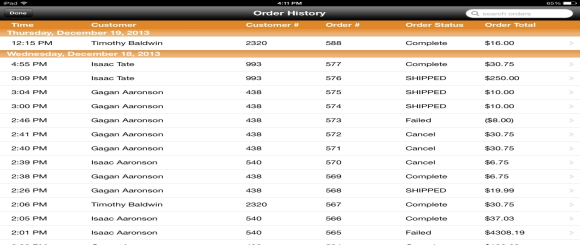
The order history can be seen by clicking the History button on the top left. The order history provides information about all the orders placed through POS app for that event irrespective of their status. Additional details for each order can be seen by selecting that order.
Note
An email receipt can be sent for any order that has not received a receipt.
Disabling Camera Scanning
If you are not using camera scanning, you can disable this feature by pressing the camera On/Off button.
Setting Inactivity Logout Values
The POS app has a Timeout value in its Setting menu. This value is the amount of time, in minutes, that the user can be inactive before the app displays a popup menu offering the choice to continue the session or logout. If no selection is made from this popup menu, the user will be logged out.
Note
The app must contact the server to register as activity. That is, if you are not making a service call, but are just touching the screen to keep the app active, you will still be considered inactive and the popup menu will appear, to let you refresh and continue your session.
The inactivity logout time can be modified by changing the Token Provider Attribute Timeout for the Token Providers record Database Token Providers. This service is located under Web Services application.
Note
There is an Idle Time-Out (minutes) advanced setting for all IIS app pools. This setting needs to be more than or equal to the value set for Timeout attribute mentioned above. If you adjust the value of timeout value, the Idle Time-Out (minutes) setting needs to be updated for both the POS and Framework app pools. If this setting is not set as per the requirement, the POS app can have some unexpected behavior.
Viewing Reports
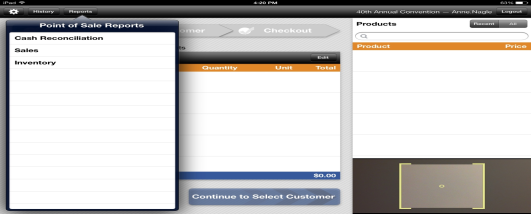
Clicking the Reports button on the top left provides the list of web reports available for the POS app. The reports available by default are:
- Sales Report
- Inventory Report
- Cash Reconciliation Report
- Cash Reconciliation Report – Payment Type
Troubleshooting Tip
If you encounter problem in sorting reports data by date, perform the following steps:
- Update Database Object vwPOSProductReportVirtual by replacing pod.OrderDate by Convert(varchar(10), pod.OrderDate, 101) As OrderDate.
- Update Database Object vwPOSOrderReportVirtual by replacing po.OrderDate by Convert(varchar(10), po.OrderDate, 101) As OrderDate.
Related content
Copyright © 2014-2017 Aptify - Confidential and Proprietary

