Creating Multiple Base Views Manually
- admin (Deactivated)
As of Aptify 5.5.1, you can create multiple base views. Follow the steps below to create additional base views manually:
- Log in as an administrative user.
- Go to Framework > Entities and open the top-level entity in which you want to create another base view.
- Go to Base Views tab and open a new Base Views record.
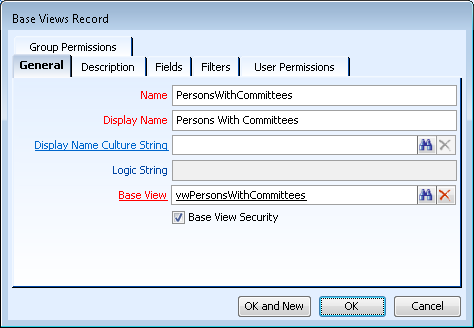
On the General tab, enter a Name for the base view.
Note
The base view name must be unique (It should not be the same as another base view on the entity) and cannot contain spaces.
- Enter a Display Name for the base view.
- If using localization, enter a culture string in the Display Name Culture String field.
- Enter a name for the base view that will be generated.
- This is typically the plural name of the Base View with vw as the prefix.
- This is typically the plural name of the Base View with vw as the prefix.
If you want to specify permissions for this base view that is different from the permission for the entity itself, select the Base View Security option. Then use the Group Permissions and/or User Permissions tabs to configure the appropriate permissions.
Note
If you select this option without specifying information on the User Permissions and/or Group Permissions tabs, the base view will be disabled for all users.
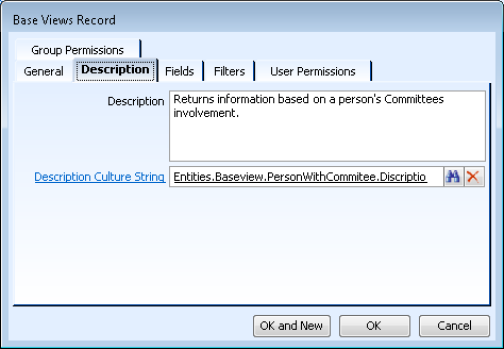
- If you want to display a description when using this base view with finds and views, go to the Description tab and enter a short Description and, if desired, a localized version in the Description Culture String.
Go to the Fields tab and open a new Fields record.
Note
Make sure the Is Name field for the current entity is added as a field. This ensures that operations like executing a find from a link box work as expected.
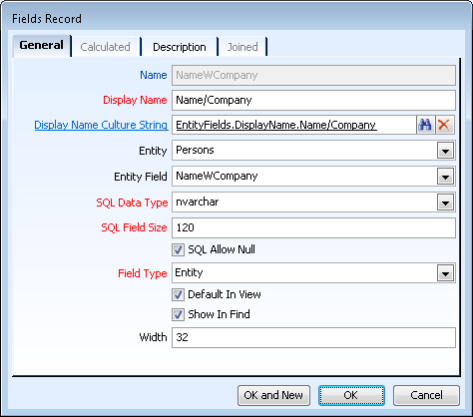
Enter a Name for the field.
Just like entity fields, the name for the base view field cannot contain spaces.Note
Once the Fields record is saved, the name of the base view field cannot be modified and the field is disabled.
- Enter a Display Name for the field.
- If using localization, enter a culture string in the Display Name Culture String field.
- If you are adding a field that is part of the current entity or another entity, select the Entity from the drop-down. If specifying a calculated field, leave the Entity field drop-down blank and select Calculated from the Field Type drop-down field.
- If the field you are adding is from the current entity, the Field Type field is populated with Entity.
- If the field you are adding is from another entity, the Field Type field is populated with Joined.
Entities that have a direct relationship to the current entity are listed first in the Entity drop-down.
Important Note
If there is no direct relationship from the current entity to the entity with the field in which you want to add, prerequisite steps are required. Attempting to save the base view without performing these steps will cause the save to fail. See Best Practices for Adding Fields to a Base View from Entities with Non-Direct Relationships for more information.
Select the name of the field from the Entity Field drop-down.
The characteristic(s) for the field (SQL Data Type, SQL Field Size, SQL Allow Null, Default In View, Show in Find and Width) populate automatically via flow down.Note
You can modify accordingly, however, keep in mind that certain changes may have undesirable affects (for example, reducing the field size). Aptify recommends using the default field characteristics whenever possible.
- If you specified a field from another entity, the Field Type field is populated with Joined and the Joined tab is enabled. Select the Joined tab and specify the appropriate Join Foreign Key and Join Type.
- If you specified Calculated as the Field Type, the Calculated tab is enabled. Select the Calculated tab and specify the appropriate Calculated Field Expression.
- If you want the field to be specified in Select Fields list of a view by default, select the Default In View option.
- If you want the field to be part of find results by default, select the Show In Find option.
- Click OK to save the Fields record.
- Follow Steps 10 through 18 above to add additional fields as necessary.
- Once all the appropriate fields have been added, you can add filters to further define the results that are returned with the base view. To do so, select the Filters tab on the Base Views record and add the appropriate filters.
- Creating filter rules for Base Views records is similar to creating filters for views. See Defining View Filters for more details.
- Once a filter is applied, the logic is displayed on the General tab as a disabled field.
- Click OK to save the Base Views record.
- Save the Entities records.
- The base view is generated and is ready for use for find and view operations for the particular entity.
Copyright © 2014-2017 Aptify - Confidential and Proprietary