Inherit From Stock JavaScript
- admin (Deactivated)
When you want to extend or change stock functionality implemented in JavaScript, you should inherit from the stock JS "class".
Writing a client-side plugin that inherits from stock functionality is very similar to writing a stand-alone client-side plugin, with a little extra metadata configuration to make sure Aptify Web still loads the base JavaScript used by your derived JavaScript.
- Figure out the fully-qualified name of the stock functionality you want to inherit from:
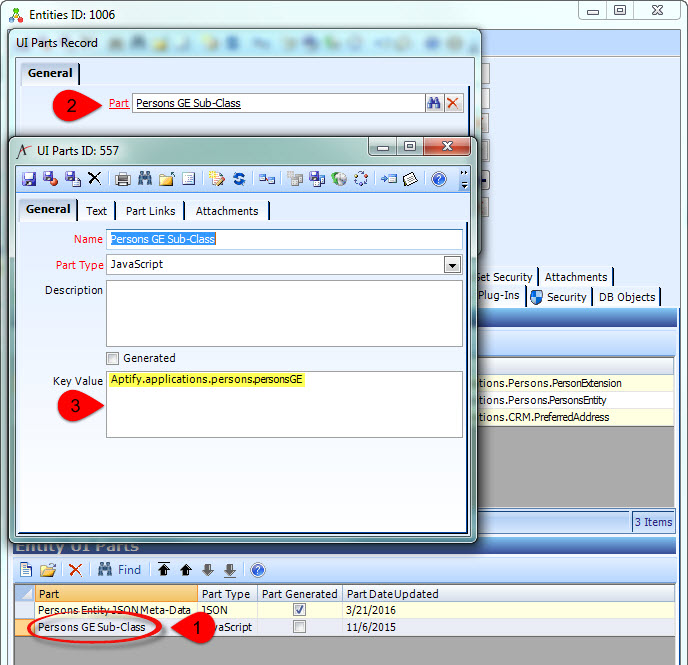
GE Plugin: find the Key Value of the existing JavaScript Entity UI Part.
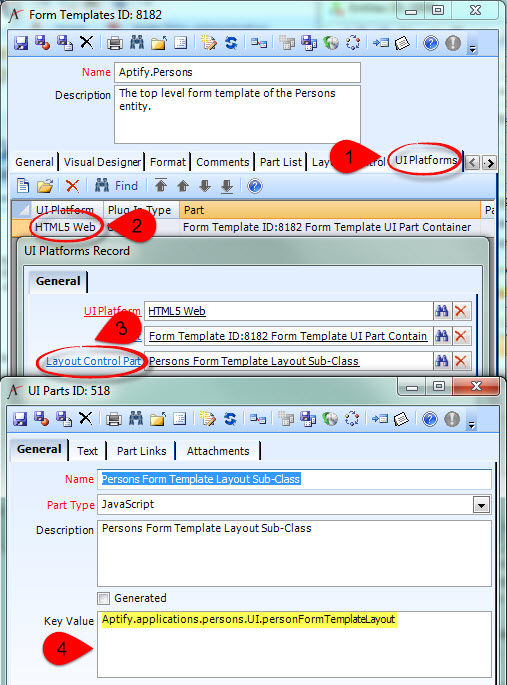
Form Template Layout Control: find the Key Value of the existing JavaScript Layout Control UI Part.
- Form Component
This can sometimes be tricky with stock Form Components. Older "magic" Components do not always have a UI Platform specified in metadata, so we can't always rely on finding the Key Value.First check the metadata on the Form Component record:
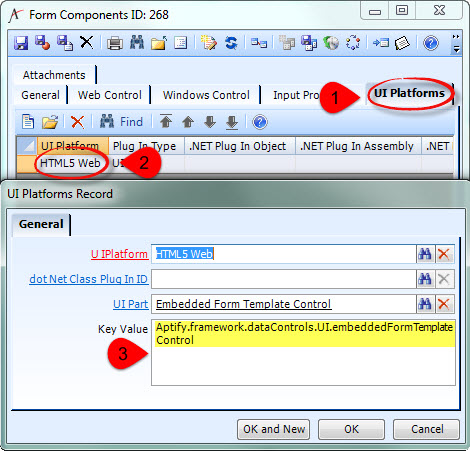
If you can find the Key Value this way, you're done!
If the Form Component has no UI Platform specified, you'll have to figure out what the fully-qualified name is based on the HTML5 metadata generated for a Form Template Part that uses that Form Control.
- Find or create a top-level Form Template containing a Form Template Part using the Form Component you're interested in. Note the ID of the Form Template and the ID of the Form Template Part.
- If you created or altered the Form Template, run the "Generate HTML5 Web Form Template UI Parts" Process Flow with these Input Properties:
- FormTemplateSelection: ListOfFormTemplateIDs
- FormTemplatesToGenerate: <the ID of your top-level Form Template>
- GenerateFormTemplateStaticData: True
- GenerateWizardFormTemplates: True
- Open the UI Part for the top-level Form Template. It's a Container-Type Part, so go to the Part Links tab and open the linked HTML Part. The information you need will be on the Text tab.
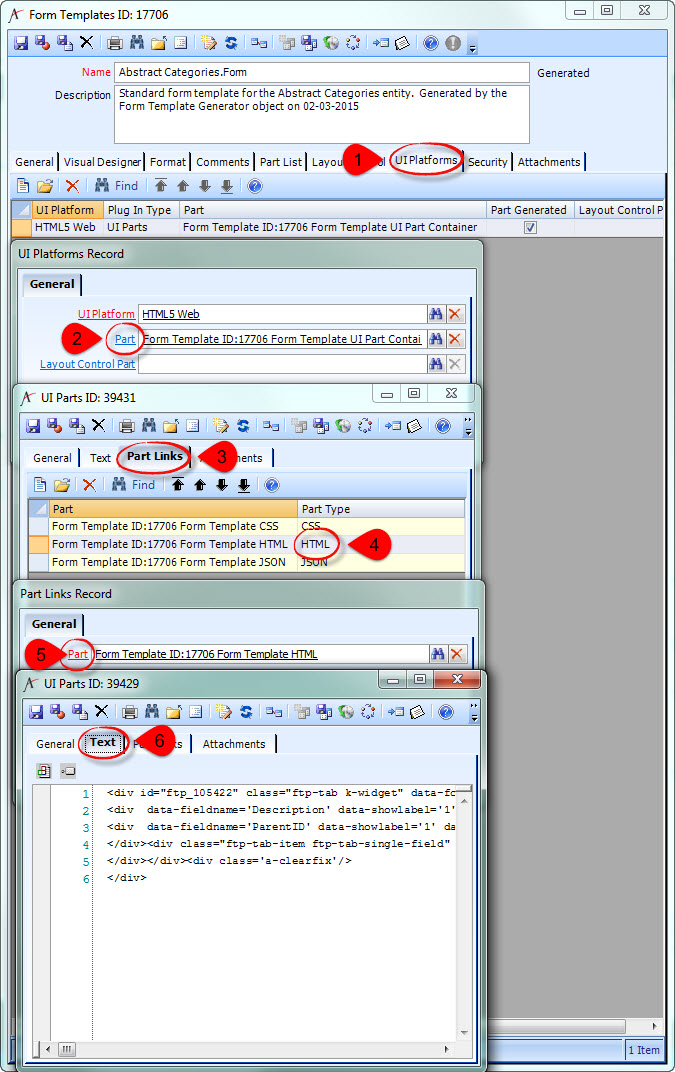
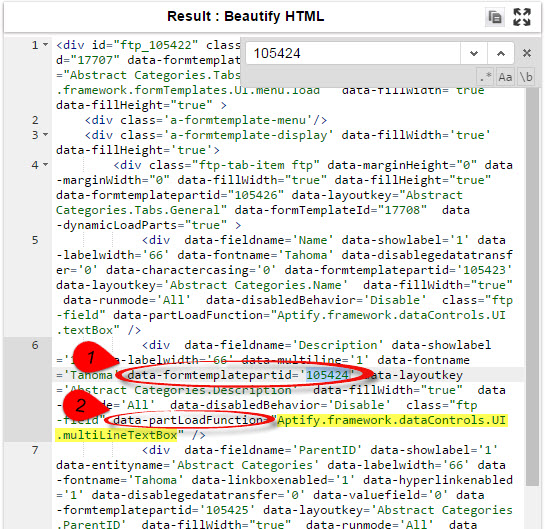
- You'll need to find the <div> that corresponds to the Form Template Part that uses the Form Component. If there's not much in the Text tab (as in the example above), you can probably do this just by visually scanning for the ID of the Form Template Part. However, this can be quite tedious with large amounts of text, so you're probably better off copying and pasting the text into a text editor or an HTML beautifier so you can search it.
- Find the <div> where the data-formtemplatepartid attribute is the ID of the Form Template Part. The data-partLoadFunction attribute for that <div> contains the fully-qualified name of the Form Component.
- Find the <div> where the data-formtemplatepartid attribute is the ID of the Form Template Part. The data-partLoadFunction attribute for that <div> contains the fully-qualified name of the Form Component.
- Dashboard Component
This can sometimes be tricky with stock Dashboard Components. Older "magic" Components do not always have a UI Platform specified in metadata, so we can't always rely on finding the Key Value.First check the metadata on the Dashboard Component record:
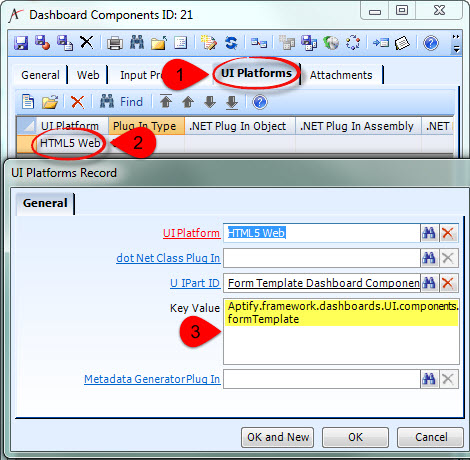
If you can find the Key Value this way, you're done!
If the Form Component has no UI Platform specified, you'll have to figure out what the fully-qualified name is based on the HTML5 metadata generated for a Dashboard Part that uses that Dashboard Control.
- Find or create a Dashboard containing a Dashboard Part using the Dashboard Component you're interested in. Note the ID of the Dashboard and the ID of the Dashboard Part.
- If you created or altered the Dashboard, run the Generate HTML5 Web Dashboard UI Parts Process Flow with these Input Properties:
- DashboardSelection: ListOfDashboardIDs
- DashboardsToGenerate: <the ID of your Dashboard>
- Open the UI Part for the Dashboard record. It's a Container-Type Part, so go to the Part Links tab and open the linked HTML Part. The information you need will be on the Text tab.
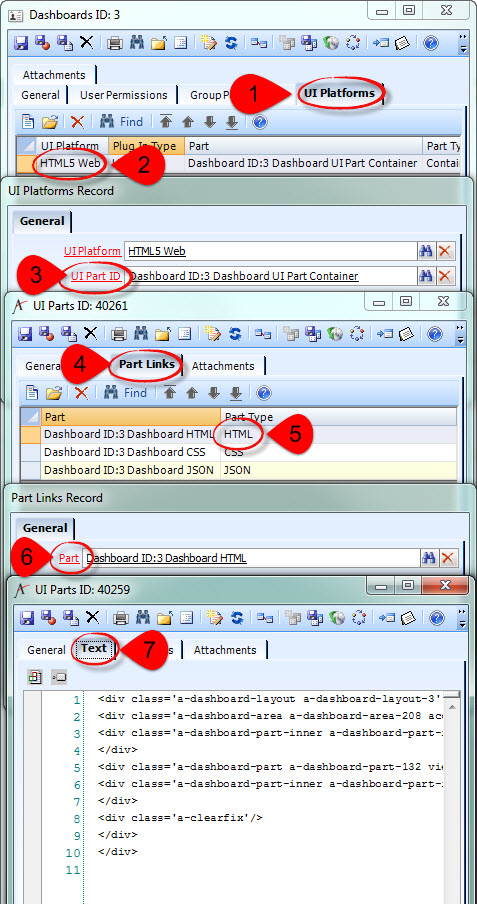
- You'll need to find the <div> that corresponds to the Dashboard Part that uses the Dashboard Component. If there's not much in the Text tab (as in the example above), you can probably do this just by visually scanning for the ID of the Dashboard Part. However, this can be quite tedious with large amounts of text, so you're probably better off copying and pasting the text into a text editor or an HTML beautifier so you can search it.
- Find the <div> with the a-dashboard-part-inner-<Dashboard Part ID> class. The data-partLoadFunction attribute for that <div> contains the fully-qualified name of the Dashboard Component.

- Find the <div> with the a-dashboard-part-inner-<Dashboard Part ID> class. The data-partLoadFunction attribute for that <div> contains the fully-qualified name of the Dashboard Component.
- Start with the JavaScript template code for the type of stock functionality you're overriding.
Near the top of the file, there is a call to Aptify.framework.inheritance.inherit(), i.e.
GE Subclass (Entity Plugin)// Inherit from the Aptify Generic Entity Aptify.framework.inheritance.inherit(this, new Aptify.framework.genericEntity.aptifyGenericEntity());
Layout Control// Inherit from the generic Form Template Layout Aptify.framework.inheritance.inherit(this, new Aptify.framework.formTemplates.UI.layout());
Custom Control (Form Component) and Custom Dashboard Control (Form Component)// Inherit from the generic bound control // Do this even if your control is NOT bound to a specific field. Aptify.framework.inheritance.inherit(this, new Aptify.framework.dataControls.UI.boundControlBase(domElement));
Instead of inheriting from base stock functionality, you need to change that line to inherit from the fully-qualified name you found in Step 1, i.e., if using the fully-qualified names used in the Step 1 examples:
GE Subclass (Entity Plugin)// Inherit from the stock Aptify Persons GE Subclass Aptify.framework.inheritance.inherit(this, new Aptify.applications.persons.personsGE());
Layout Control// Inherit from the stock Aptify Persons Form Template Layout Control Aptify.framework.inheritance.inherit(this, new Aptify.applications.persons.UI.personFormTemplateLayout());
Custom Control (Form Component)// Inherit from the stock Aptify Multi Line Text Box Aptify.framework.inheritance.inherit(this, new Aptify.framework.dataControls.UI.multiLineTextBox(domElement));
Custom Dashboard Control (Dashboard Component)// Inherit from the stock Entity List View Aptify.framework.inheritance.inherit(this, new Aptify.framework.views.UI.entityListView(domElement));
- Of course, you can override any of the base methods templated out in the template you're working from. But you're probably more interested in overriding functionality specific to the stock functionality you chose. The simplest way to do this is to examine the methods available on an instantiated object of the stock functionality.
- Load Aptify Web and open the Chrome Developer Tools.
In the Console of the Developer Tools, create a new stock object. This example will use the Persons GE, but you can do this with any of the stock functionality types. (If you create a Form Component or Dashboard Component object to explore, you don't need to bother to pass a domElement.)
Create an Object to Explore Available Methodsvar stock = Aptify.applications.persons.personsGE();
- Type "stock." in the console. Chrome will provide you an autocomplete list. In this list are all the properties and methods of the stock object that are accessible publically. All publically-accessible methods can be overriden, and you can continue to explore them via the console.
Follow the pattern established in the template code to refer to the base object and call the base object's methods:
_that.base().isDirty();
- Once you have placed your code in a UI Part and configured the relevant Aptify metadata links, you need to do a little bit of extra work to make sure Aptify knows it also needs to keep loading the stock code from which you derived. (You don't need to do this when creating brand-new plugins because Aptify will always load the most-base functionality like the generic entity.)
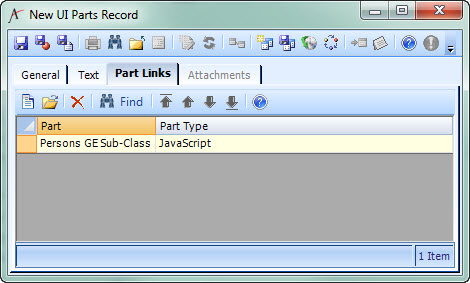
For example, your UI Part might look like this: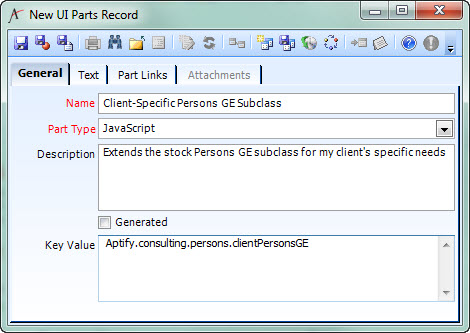
- Open your JavaScript UI Part and go to the Part Links tab.
- Add a Part Link to the UI Parts from which you inherited, e.g.,:
If you have an ancestral chain that's deeper, each UI Part only needs to link to its immediate parent.
If you inherited from stock functionality that you couldn't find in a UI Part (such as a "magic" Form Component or Dashboard Component), you don't need to link to the parent UI Part... after all, there's no UI Part to link to.
If you're overriding stock functionality, make sure to edit the stock Entity UI Part or UI Platform to link to your new UI Part rather than the stock UI Part.
Related articles
Filter by label
There are no items with the selected labels at this time.
Related content
Copyright © 2014-2017 Aptify - Confidential and Proprietary