Removing Duplicate Windows Tasks for Scheduled Views
- admin (Deactivated)
Perform the steps below to ensure scheduled views are not run more than once.
Note for those installing Aptify 6.0
If your Application Server was updated to ensure that there are no duplicate windows for scheduled views in a previous release, you do not have to perform the steps below after applying the updated version of the Aptify AsyncProcessor.exe file if the database server is already running the previous Aptify release and the Application Server is running the Aptify AsyncProcessor.exe file from the previous release.
Note
The steps below require that an organization delete or disable the existing Windows Tasks for scheduled views. Deleting the Windows Tasks will also remove any run execution history for this particular task within the Windows Task Scheduler. Aptify recommends you review your business processes to determine which approach is suitable for your organization.
- Install the Aptify update on your database server if you have not done so already.
- Apply the updated AptifyAsyncProcessor to your application server if you have not already. See Updating the AptifyAsyncProcessor.exe File for more details on how to perform this step.
- If started on your application server, open the Windows Services dialog (Start > Control Panel > Administrative Tools >Services) and stop the Aptify 6.0 Asynchronous Processor or Aptify 6.0 Asynchronous Processor service (depending on the original version of the application server).
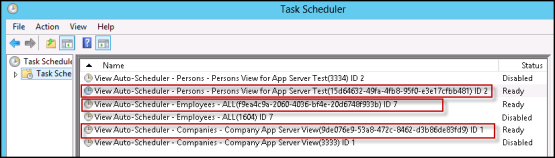
- Open the Task Scheduler dialog (Start > Control Panel > Administrative Tools >Task Scheduler), select Task Scheduler Library and sort the Windows Tasks by Name in reverse order.
By default, Task names that start with View Auto-Scheduler denote scheduled views.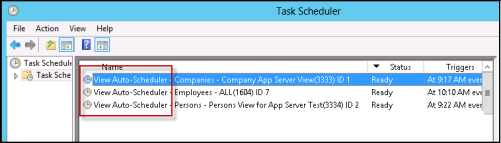
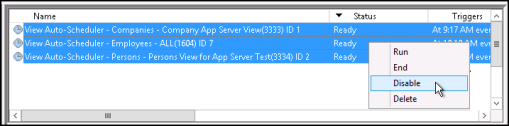
- Depending on your organization best practices, disabled or delete all Windows Tasks for scheduled views (that is, tasks that start with View Auto-Scheduler) using one of the methods below:
- You can disable one or more Windows Task by selecting the tasks you want to disable, and then right-click and select Disable.
- You can delete one or more Windows Tasks by selecting the tasks you want to delete, and then right-click and select Delete.
- From the Windows Services dialog (Start > Control Panel > Administrative Tools >Services), start the Aptify 6.0 Asynchronous Processor service (depending on the original version of the application server).
- Log into the Aptify database with a user account that has system administrator access.
- Go to the Views service and open the All Scheduled Views view.
You can also create your own view by creating view that is filter by IsScheduled set to 1 (or True).
The Entity Bulk Operation wizard is supported for use in List, Prompt, and Chart Drilldown views.
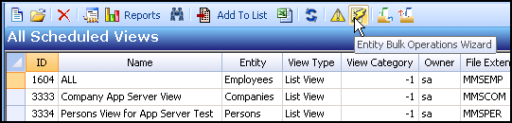
- In the view's toolbar, select the Entity Bulk Operations Wizard button to launch the EBO wizard.
- Click Next.
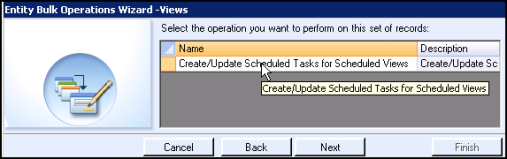
- Select the Create/Update Scheduled Tasks for Scheduled Views operation.
- Click Next.
- Click Finish.
- This operation will update the scheduled views in the view (and the corresponding Scheduled Tasks records) so that a new Windows Tasks is created on the application server based on the view's UniqueID.
- This operation will update the scheduled views in the view (and the corresponding Scheduled Tasks records) so that a new Windows Tasks is created on the application server based on the view's UniqueID.
- From the application server, open the Task Scheduler to verify that new Windows Tasks are created (and enabled) based on the view's UniqueID.
- Lastly, run the necessary tests to ensure that scheduled views are run only once.
Related content
Copyright © 2014-2019 Aptify - Confidential and Proprietary