Installing Aptify 5.5.1 Server Software
- admin (Deactivated)
This topic describes how to install the server software for the Aptify 5.5.1 service pack.
Note
Aptify strongly recommends that you install and test the installation on a test environment first using a copy of your production server before running it directly on the production server. Also, review Important Pre-Installation Considerations before starting an installation.
Perform the following steps to install Aptify 5.5.1
- Backup your Aptify database server.
- Close the Aptify desktop application on the computer, if currently running.
- Download the Aptify 5.5.1 Service Pack Installer ZIP file to a folder on the computer and unzip its contents.
- You can run the installation from any computer on the network as long as the user has permissions to the computer hosting the SQL server.
Run the installation program locally on the computer to which you copied the installation files; do not run it over the network.
Note Concerning Character Limitations
The Windows API requires that fully qualified file names are less than 260 characters. Aptify recommends that the Aptify 5.5.1 Service Pack Installer ZIP file is unzipped in a folder close to the drive's root folder (for example C:\Downloads) in order to limit the possibility of exceeding the character limitation for fully qualified file names imposed by the operating system.
- Right-click the Setup.exe file and select Run As Administrator option to launch the Aptify 5.5.1 Installer.
- On Windows Server 2008, the Run as Administrator option bypasses the server's User Access Control (UAC) for the duration of the installation.
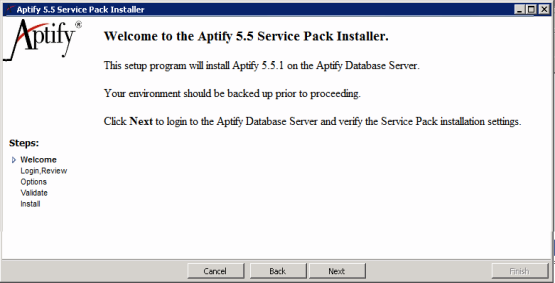
- Review the Installation welcome screen and click Next to continue.
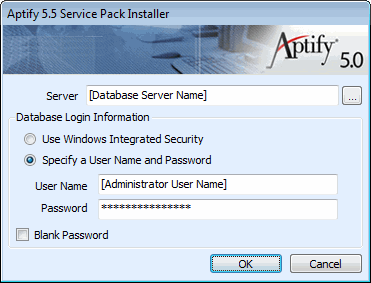
- Enter login information for your database server. Specify an account with system administrator privileges.
- Review the displayed setup information concerning your database server's configuration and click Next to continue.
- The installer identifies the set of Aptify applications detected on the database server. Options include Platform (for the Aptify Framework), Core Business Applications (for Aptify's standard CRM business applications), add-on applications, and if applicable, the optional e-Business/Surveys applications.
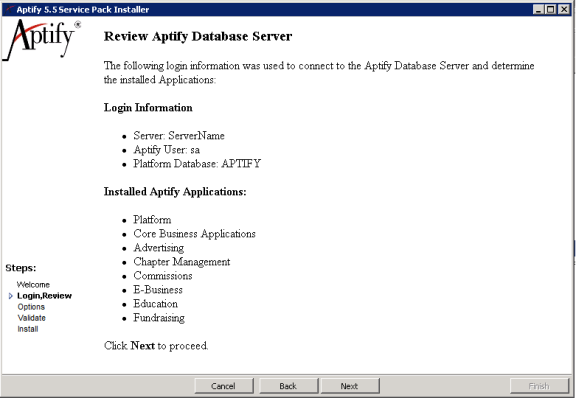
- The installer identifies the set of Aptify applications detected on the database server. Options include Platform (for the Aptify Framework), Core Business Applications (for Aptify's standard CRM business applications), add-on applications, and if applicable, the optional e-Business/Surveys applications.
- The Upgrade Installer automatically identifies the current version of Aptify installed on the database server and checks the box that corresponds to the update(s) not currently installed.
- For Aptify 5.5.1, there is only one option that should be checked by default. This box must remain checked in install 5.5.1.
- Enter a shared folder on the Aptify database server to which your user account has read/write access in the UNC Path field. (This is the Windows domain account you have used to log into the database server.)
- You must enter the shared folder's path in the UNC (Universal Naming Convention) format.
- During installation, the installer copies certain updated assemblies to the server location you specify. Therefore, the account currently logged into the database server must have read/write access to that location on the database server.
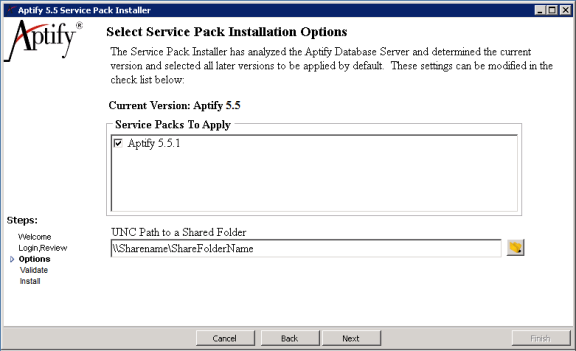
- Click Next to continue.
If you have organization specific configurations, you can check any or all of the options on the Validation step to help identify invalid repository and database objects, and foreign key constraint errors.
Note
Aptify recommends that you check all validation options to ensure Aptify 5.5.1 installs successfully.
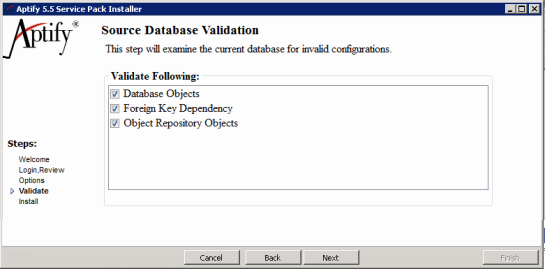
- If the setup detects a database validation error, a dialog appears alerting the user of the error with appropriate steps to troubleshoot further. Clicking OK closing the dialog.
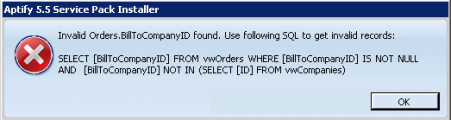
- If the setup detects a database validation error, a dialog appears alerting the user of the error with appropriate steps to troubleshoot further. Clicking OK closing the dialog.
- Click Next to continue.
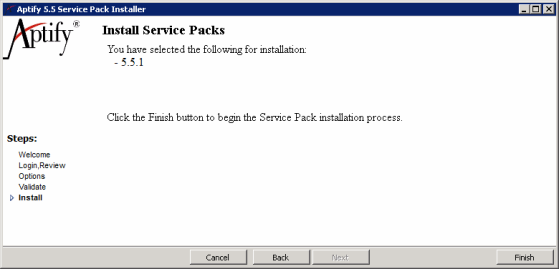
Note that you will not be able to click the Next button and continue with the installation of 5.5.1 until any validation errors are resolved. - Click Finish to begin the installation.
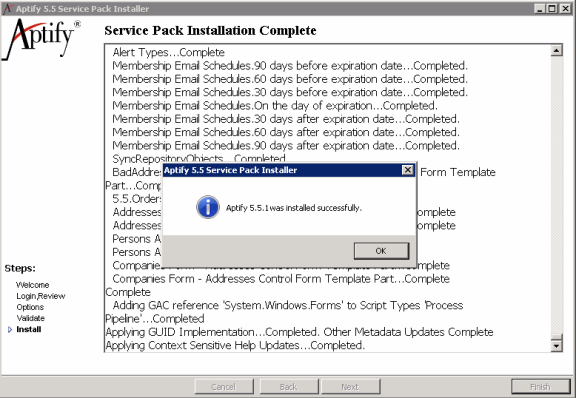
- Click OK when prompted that 5.5.1 has been successfully installed to close the installer.
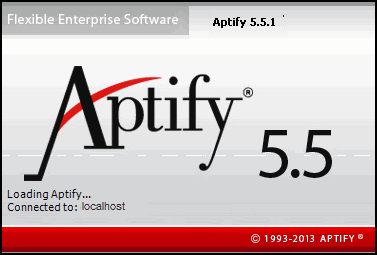
- Launch the Aptify desktop application to confirm that the update has been successfully installed. During the load process, the splash screen image should change and the version should increment from Version 5.5 to Version 5.5.1
- Have each user close and reopen the Aptify Windows desktop application on his or her computer to automatically download any applicable 5.5.1 files to the computer's Aptify Program Files folder.
- If your organization uses the View Scheduling feature to schedule the execution of one or more views by an application server, follow the instructions in Removing Duplicate Windows Tasks for Scheduled Views topic to prevent duplicate Windows Tasks from executing.
- If you have Aptify e-Business or Aptify Web Access (AWA) installed, run the Object Repository Synchronizer utility to update the e-Business and/or AWA site's Bin folder so it has the latest Aptify objects. The Object Repository Synchronizer is included in the service pack's Utilities folder. For e-Business 5.5, be sure to only download objects from the e-Business Sync Repository Objects record. See Running the Object Repository Synchronizer for more information.
Related content
Copyright © 2014-2017 Aptify - Confidential and Proprietary