/
Creating a Substitute Class
Creating a Substitute Class
If desired, you can track acceptable substitute classes and courses as separate records in Aptify. Follow these steps to add a substitute class to Aptify:
- Open a new record from the Classes service.
- Enter an identifying Class Number for this course.
- Generally, an organization uses a class number to identify each class of the same course. Aptify recommends that the class number you enter indicates that this is a substitute class.
- Generally, an organization uses a class number to identify each class of the same course. Aptify recommends that the class number you enter indicates that this is a substitute class.
- Select or enter the Course.
- Enter the course for which this class is a substitute.
- Enter the course for which this class is a substitute.
- Select a Product for the class (or create a new product, if necessary).
- This field is not applicable to substitute classes that are given outside of the organization but it is a required field to save a Classes record.
- This field is not applicable to substitute classes that are given outside of the organization but it is a required field to save a Classes record.
- In the Type field, select one of the following options: Classroom, At Work, Independent Study, or Internet to describe the class setting for the substitute class.
- On the General tab, select or enter the School that is offering this substitute class.
- Enter or select the name of the Instructor of the substitute class.
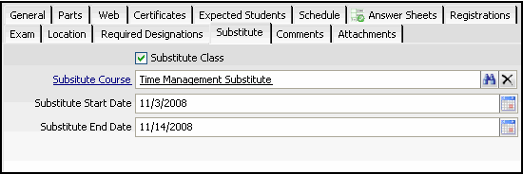
- Click the Substitute tab.
- Select the Substitute Class box.
- Enter the substitute course that this class is related to in the Substitute Course field.
- This assumes that you are tracking substitute courses as Courses records.
- This assumes that you are tracking substitute courses as Courses records.
- Enter the Start and End Dates for this substitute class.
- Save and close the Classes record.
, multiple selections available,
Copyright © 2014-2019 Aptify - Confidential and Proprietary
