Configuring a Windows Terminal Server for Aptify
- admin (Deactivated)
This topic provides an overview for how to set up a terminal server to host multiple client sessions on Aptify. These instructions assume that your terminal server is a computer on your network that communicates with the database server. Aptify recommends that you do not install terminal services on your database server.
The steps described in this section assume that you are already familiar with Windows domain administration, Aptify administration, and general PC support. Perform all steps described in this section while logged in as Administrator, unless otherwise noted.
- Step 1: Deploy Terminal Services
- Step 2: Install Microsoft Office 2007
- Step 3: Install Aptify Desktop Client
- Step 4: Connect to Aptify Server
- Step 5: Run the Object Repository Synchronizer
- Step 6: Enable Automatic Downloads and Other Configuration Changes to Attributes.xml
- Step 7: Test Terminal Server Operation
Step 1: Deploy Terminal Services
Deploy Terminal Services on the server according to Microsoft's documentation and recommendations.
Step 2: Install Microsoft Office
Aptify recommends that you install Microsoft Office on the terminal server using the steps below. Aptify supports Microsoft Office 2007 and up.
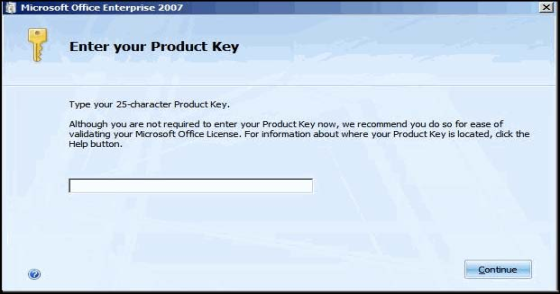
- Launch the Microsoft Office installation wizard.
- Enter a Product Key.
- Note that an Office product key that is compatible with terminal server must be used. If you have questions about this requirement please contact your Microsoft licensing representative.
- Note that an Office product key that is compatible with terminal server must be used. If you have questions about this requirement please contact your Microsoft licensing representative.
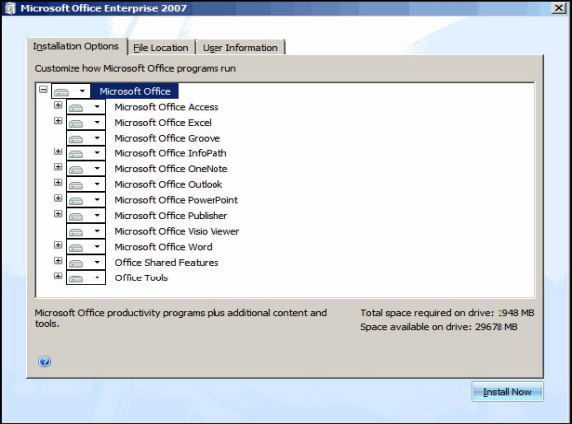
- Choose the Custom Install option and select all available options.
Step 3: Install the Aptify Desktop Client
Install the Aptify Desktop client on the terminal server as described in Installing the Aptify Desktop Client.
If you are running Aptify 5.5.3, you should install .NET Framework 4.5 on the terminal server prior to installing the Aptify.5.0 Desktop client. The Installer for .NET Framework 4.5 can be found in the APTIFY_553_Desktop_Update.ZIP package for Desktop updates (available in your organization's folder on the Aptify FTP site).
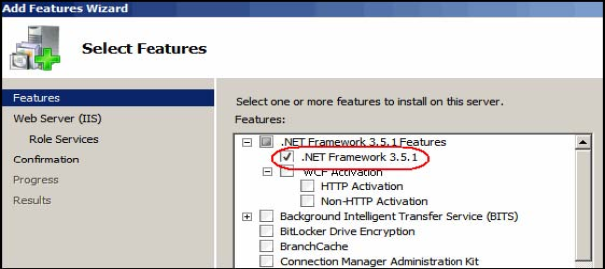
If your terminal server is running Windows Server 2008 or 2008 R2, you may need to install the .NET Framework 3.5.1 feature prior to installing the Aptify 6.0 Desktop client. Follow the steps below:
- Launch Managed Services from Control Panel > Administrator Tools.
- Select the Features node from the left panel.
- If the .NET Framework 3.5 feature does not appear in the list of installed features, right-click the Features node from the left-hand panel and select the Add Features to add the .NET Framework feature.
- Expand the .NET Framework 3.5.1 Features option.
- Select the .NET Framework 3.5.1 item only.
- Click Next to continue.
- On the Confirm Installation Selections page, select the Install button to complete the process
Once the installation of the Desktop client is complete, run the Object Repository Synchronization Utility to ensure the terminal server's files are synchronized with the database server. See Step 5: Run the Object Repository Synchronizer for more details.
Step 4: Connect to the Aptify Server
Once the Desktop client is installed and the object repository synchronization process is complete, log into the database server to verify you can connect to (and navigate) the database using the procedure in Connecting to an Aptify Server Using the Desktop Client.
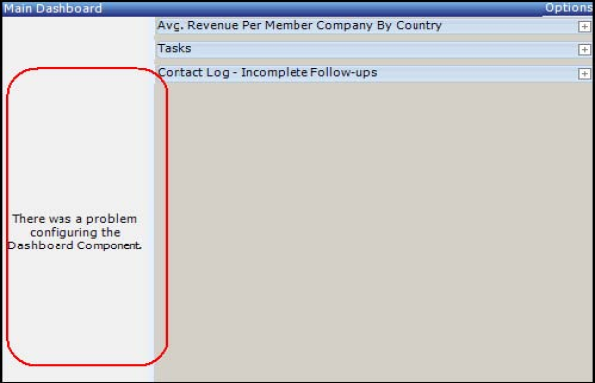
After logging in to Aptify for the first time, you may receive an error when attempting to navigate the system. For example, a Dashboard Component error may appear as shown below. This occurs if the database server is not configured to allow clients to automatically download objects from the repository. See Step 6: Enable Automatic Downloads and Other Configuration Changes to Attributes.xml for more information on how to resolve this issue.
Step 5: Run the Object Repository Synchronizer
One difference between a Terminal Server environment and a single-user environment is that all users in a Terminal Server environment use the same set of objects in the C:\Program Files\Aptify 5.0 folder. This type of user model reduces, but does note eliminate the need for Aptify's automatic Object Repository Download service (for example, many of the components a user needs will already be in memory when he or she connects so there is no need to download the component separately for each user).
Run the Object Repository Synchronizer utility on the terminal server, as described in Running the Object Repository Synchronizer.
Step 6: Enable Automatic Downloads and Other Configuration Changes to Attributes.xml
The steps below include instructions for modifying Attributes.xml to automatically log in terminal server users to a specific server using a trusted connection (in other words, the Aptify Login screen will not appear.) The steps below also includes instructions on how to modify the file to automatically download objects from the repository (note that this step is only necessary if the database server is not configured to allow downloads from the repository automatically).
These instructions recommend modifying Attributes.xml since this file applies to a local computer only and is not stored in the Object Repository. Therefore, the contents of this file will not be overwritten with a copy from the repository by subsequent Synchronizer runs. Also, by modifying Attributes.xml locally, an organization can support an environment that uses a mix of terminal server users and standard desktop application users who access Aptify directly from their individual computers.
Note that Attributes.xml also supports other configurations, as described in Modifying User Login Preferences.
Follow these steps:
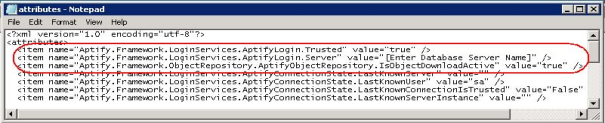
- Open the Attributes.xml file with a text editor, such as Notepad.
- This file is located in the Aptify program files directory on the terminal server, typically C:\Program Files\Aptify 5.0.
- This file is located in the Aptify program files directory on the terminal server, typically C:\Program Files\Aptify 5.0.
Add the following key to the Attributes file to force trusted connections only. This will suppress the Database Login Information section of the Aptify Login dialog and require only trusted user connections to the database.
<item name="Aptify.Framework.LoginServices.AptifyLogin.Trusted" value="true"/>
Add the following key to the Attributes file to set the server to which all terminal servers will connect.
<item name="Aptify.Framework.LoginServices.AptifyLogin.Server" value="[Enter Your Database Server Name]"/>
- When used in conjunction with the Trusted = true key, these two keys suppress the Aptify Login dialog. (In other words, users will login automatically to the specified server as a trusted user and will not be prompted to login.)
- When used in conjunction with the Trusted = true key, these two keys suppress the Aptify Login dialog. (In other words, users will login automatically to the specified server as a trusted user and will not be prompted to login.)
- Add the following key to the Attributes file to disable automatic downloads from the Object Repository.
This step is only necessary if the database server is configured to allow automatic downloads from the repository.
Disabling automatic downloads from the Object Repository is particularly important web servers, because the download causes the site to recompile. In other multi-user environments, automatic downloads are disabled is to prevent the locking of files that occurs during a download. In this scenario, a separate process is required to shut down all instances of the application, synchronize the appropriate files, and restart or make the application available again. Disabling the automatic download will save some cycles and bandwidth.
<item name="Aptify.Framework.ObjectRepository.AptifyObjectRepository.IsObject-DownloadActive" value="false"/>
Add the following key to the Attributes file to disable the launching of the Startup routine even when a user is running the Aptify Shell directly.
<item value="Startup.GeneralStartup.RequiredStartUpRun" value="false"/>
- Save and close Attributes.xml.
Step 7: Test Terminal Server Operation
After completing the installation and configuration of the Terminal Server environment, connect to the terminal server from a remote computer and confirm that the remote user can successfully access Aptify over the connection.
Related content
Copyright © 2014-2019 Aptify - Confidential and Proprietary