Unpacking Configurations with the CM Tool
- admin (Deactivated)
Analytics
CM Tool First Release
This is first official release of the Aptify Configuration Migration (CM) Tool. If you have any questions or problems using the tool please contact Aptify Technical Support. Your feedback is appreciated!
This topic describes the process for unpacking entities and metadata using the Aptify Configuration Migration (CM) Tool.
The Aptify Configuration Migration (CM) Tool must be installed on the destination Aptify database server before unpacking configurations. See Installing the Aptify CM Tool for more details.
Best Practices When Using the CM Tool Unpacker
- Run the validation rules on the pack before starting the unpacking action.
- If any validation rule fails, go through the solution provided for the failed rule and try to fix the issue before starting the unpacking action. Possible solutions are provided for most rules.
- The CM Tool provides the ability to remove unwanted entities or metadata (by deselecting the appropriate check box). If you remove any entities or metadata from the pack, be sure to run the validation rules to ensure the pack will unpacks successfully.
- See Understanding the CM Tool Validation Rules for more information about the validation rules provided with this version of the CM Tool.
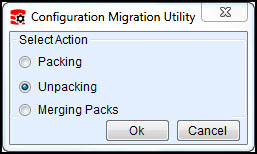
- Locate and double-click the CM Tool shortcut on the desktop of your source server. The following selection dialog will appear:
- You can also open the tool by running the AptifyConfigurationMigrationUtility executable from the Aptify directory in which you installed the tool.
- Select the Unpacking option and click OK.
- If the CM Tool is configured to automatically log into the source server (that is the username and password is already specified in the CM Tool configuration file), the CM Tool Unpacker form will display. If the CM Tool is not configured to automatically launch, the Aptify login dialog will appear and the below steps need to be followed.
- in the Server field, enter the name of the source Aptify database.
- In the User Name and Password fields, enter your user credentials for the Aptify system and click OK.
- Once logged in, the CM Tool Unpacker interface displays. Review the Server and Database specified Configuration information to make sure it appropriate.

- Enter the Pack Path and Base Database information. See the Folder Selection Section in About the CM Tool Unpacker Interface for more information.
If needed, you can modify the items you wish to unpack using the Tree View section. For example, when unpacking a pack any entity or metadata, some of the entities or related users and groups may already be present on the destination Aptify database, those items are identified with a green check mark. These items are marked to aid the user in preventing an undesired overwriting of existing data.
Concerning Removing Entities
If you deselect an entity in the Tree View, and then re-select this entity in the Tree View, any links to other entities or dependent entities that were originally present are not re-linked. However, any related metadata and its sub-type entities are re-linked.
- In the Validation Summary tab, click Validate to test the validation rules.
- If any of the rules should fail, update the unpacking settings to resolve the failure and re-run the validation.
- If you find that additional validation rules need to be added for testing the unpacking settings, see Understanding the CM Tool Validation Rules for more information.
- Click UnPack to start the unpacking action.
Related content
Copyright © 2014-2019 Aptify - Confidential and Proprietary