Adding an Application
- admin (Deactivated)
This topic describes how a user can add an application(s) to their profile.
Note that a user must have the necessary permission and be assigned the appropriate license in order to see and add a particular application to his or her profile. Application permissions and licenses are assigned to users and user groups by the system administrator.
When a user adds an application to his or her profile in the Aptify Desktop client, that application becomes available in the Navigation Bar (and Folder List). A user can also specify whether or not the application appears in the default Aptify Ribbon and/or the Applications toolbar.
Perform the following steps to add an application to your profile using the Desktop client:
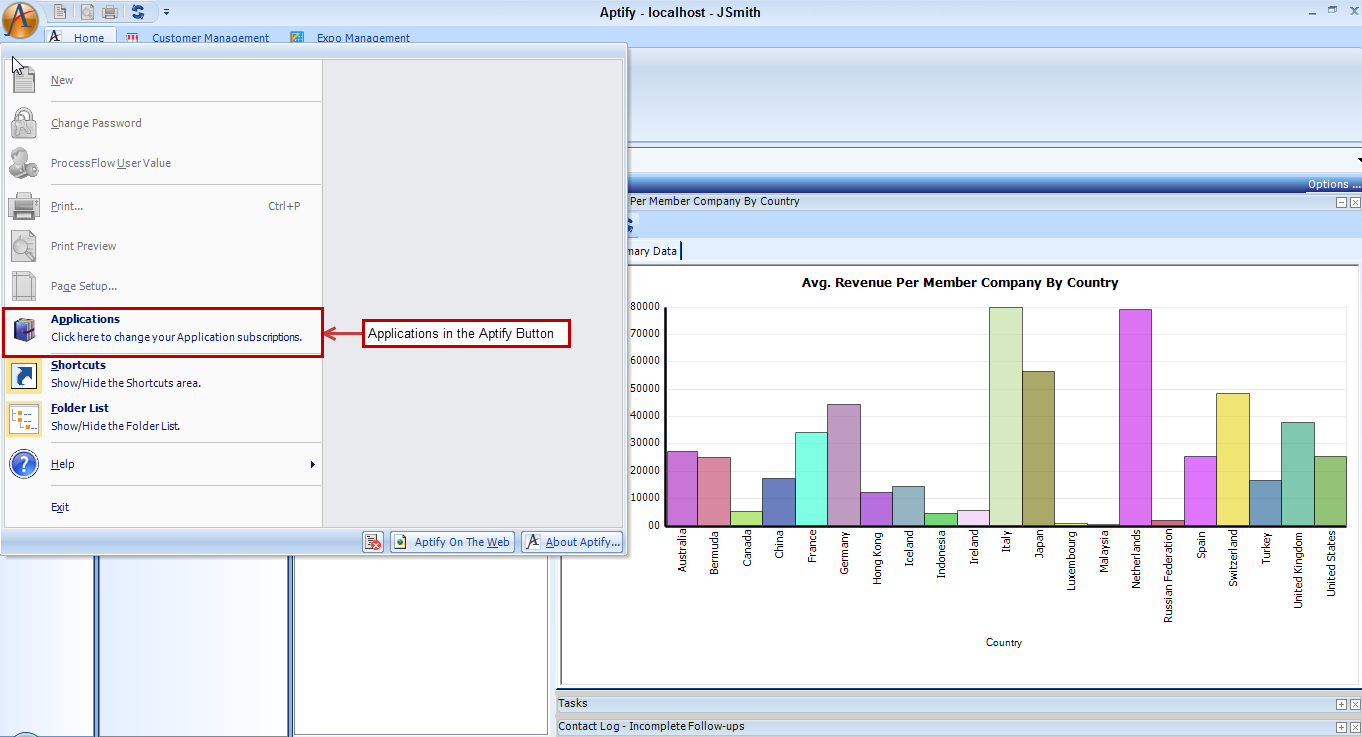
- Open the Application dialog using one of the following methods:
- Click the Aptify button and select Applications from the pop-up menu.
- From the Navigation Bar, right-click the Home heading and select Applications from the pop-up menu.
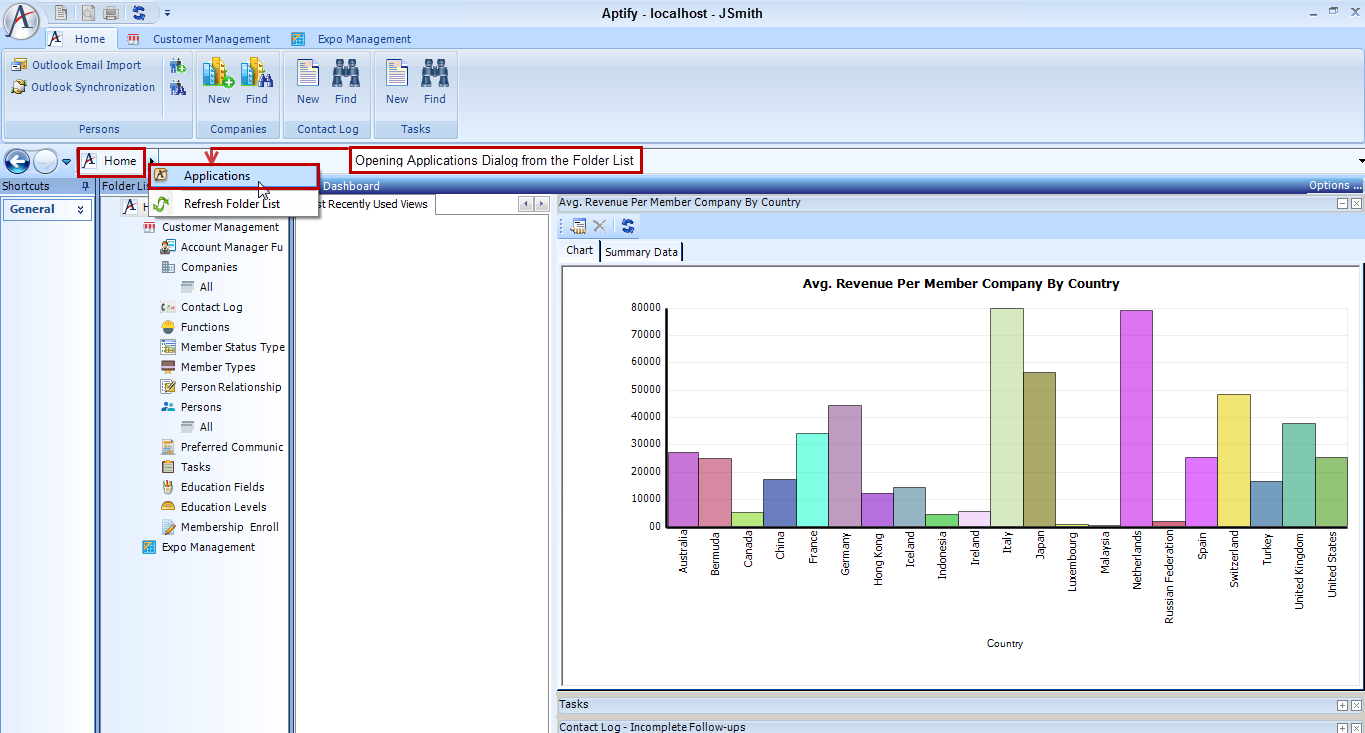
- From the Folder List, right-click the Home heading and select Applications from the pop-up menu.
- The Aptify Applications dialog contains two columns:
- The left-hand column lists the applications that are available to the user but are not currently in the user's profile.
- The right-hand column lists the applications that are currently in the user's profile.
- Click the Aptify button and select Applications from the pop-up menu.
- In the left-hand column, locate the application that you want to add to your profile.
- You can perform a keyboard search to find a particular application. To do so, select the column in the left-hand window and type the first characters in the name of the application you are searching for. When a match exists, the selection will change to that row.
- If you cannot read an application's name, widen the Name column by dragging the line between Name and Description in the header.
- Select the application and click the double right arrow (>>).
- The application moves to the installed Applications list.

- The application moves to the installed Applications list.
- Specify the appearance of the Application as follows:
- Show in Ribbon: The application appears as a tab in the Aptify Ribbon when this option is selected. See Using the Desktop Client Ribbon for more details.
- Show in Toolbar: The application appears in the Application Toolbar when this option is selected. See the Using the Applications Toolbar for more details.
- Repeat steps 2 through 4 as needed until all desired applications are listed in the installed list.
- You can also move more than one application at a time by holding down the CTRL or SHIFT key when selecting multiple applications.

- You can also move more than one application at a time by holding down the CTRL or SHIFT key when selecting multiple applications.
- Applications appear in the order you add them to the installed application column. To sort the applications alphabetically, click the Name header in the installed column.
- The installed applications re-sort alphabetically. The sort preference toggles between ascending and descending each time the application header is selected. You can also click the Description header to sort the installed applications alphabetically based their descriptions.
- The installed applications re-sort alphabetically. The sort preference toggles between ascending and descending each time the application header is selected. You can also click the Description header to sort the installed applications alphabetically based their descriptions.
- Click OK to close the Applications dialog box.
- The applications you added now appear as tab headings in the Aptify Ribbon and are accessible from the Navigation Bar (and Folder List if enabled).
- The applications you added now appear as tab headings in the Aptify Ribbon and are accessible from the Navigation Bar (and Folder List if enabled).
Copyright © 2014-2019 Aptify - Confidential and Proprietary