Building Your Own End Points in Aptify Services API
- admin (Deactivated)
Analytics
With Aptify SOA, you can define new service endpoints in metadata.Endpoint functionality is be provided by .NET classes that are defined as Plug-ins for the service endpoint.In addition to providing new service endpoints,this also allows for overrides of existing service endpoints for pre-processing,post-processing and complete overrides, if necessary.
Step-by-Step Guide For Creating Controller
In Visual Studio, create a new Class Library to add a controller. Add Aptify.Services.Framework.dll as reference in your class library. The sample code shown below illustrates how to pass parameters and display parameter values.
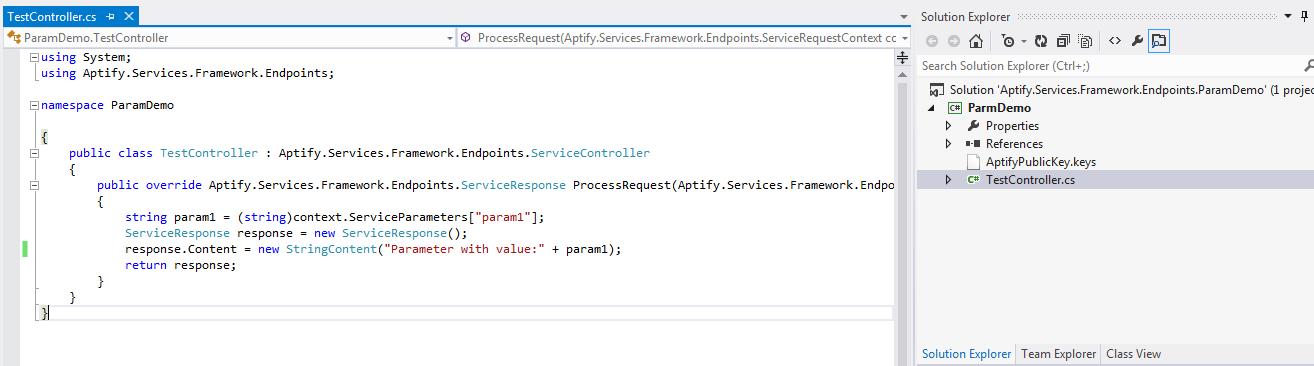
In the code above, the ServiceRequestsContext object contains information about the request, including the ControllerName, cookies, Headers, httpmethod, query parameters, AuthenticatedContext, and service parameters. Service parameters are non-literal values that are defined in route. miscProperties are used in the Authorization plugin to put the results of parsing into dictionary and provide the result to the service request. The ServiceResponse object provides information about response content.
- Build the Class to generate a compiled assembly for the new controller.
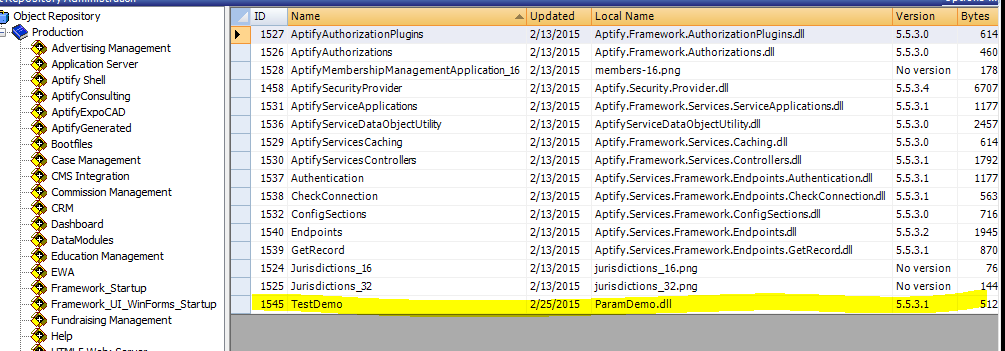
- In Aptify, add the compiled assembly as an object in the Aptify Object Repository.
- Create a new .Net Class Plug Ins record to identify the object repository location, assembly name, and class name for the new controller.
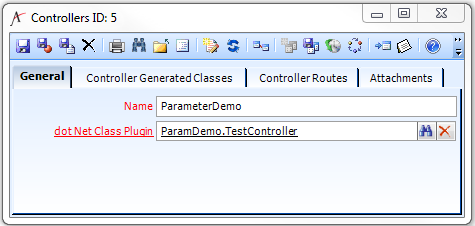
- Open a new record in the Controllers service (found in the Web Services application) and complete the information on the General tab:
- Name: Name of the controller
- dot Net Class Plugin: This links to the .Net Class Plug In record you created above for the new controller.
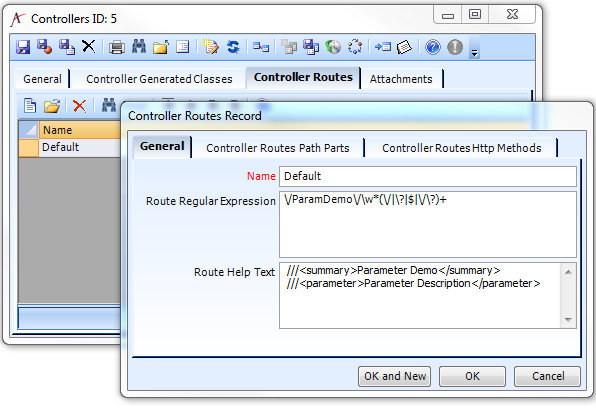
- Click the Controller Routes tab and identify at least one route definition. The Controller routes defines the URI format for how to access controller endpoint.You can add multiple controller routes. The system stores the following information for each route:
- Name: Name of Controller Route
- Route Regular Expression: The Controllers entity plugin generates the Route Regular Expression automatically. You do not need to set this value manually.
- Route Help Text: This field lets you add summary information about the controller and parameters it expects from the endpoint. These are standard .NET /// comments. Once set, these comments will be displayed automatically in help pages.
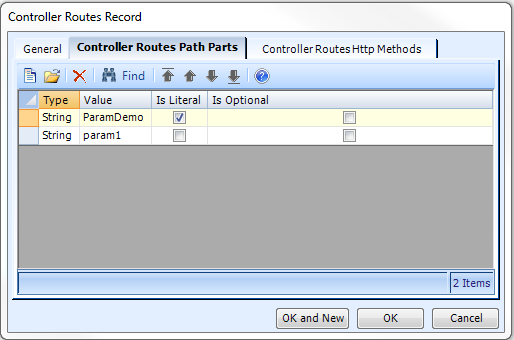
- Click the Controller Routes Path Parts tab and define the parts that Aptify will use to build the route’s URI. You can specify the following information for each path part:
- Type: Data type of the parameter, such as String or int.
- Value: This field identifies the part value or a variable that can be added to the URI. For example in the example below, ParamDemo is a part value which is included in the route regular expression, but param1 is a variable value which will be replaced by string variable in the URl.
- Is Literal: If checked, then the route regular expression will include the value as written in the URI. If unchecked, then this identifies a variable who value can change.
- Is Optional: This check box identifies if the part is optional for the URI.
- Click the Controller Routes Http Methods tab and specify the appropriate HTTP Methods for the route. You can select any standard http method from the seven available types: DELETE, GET, HEAD, OPTIONS, POST, PUT and TRACE.
- Save and close the Controllers record.
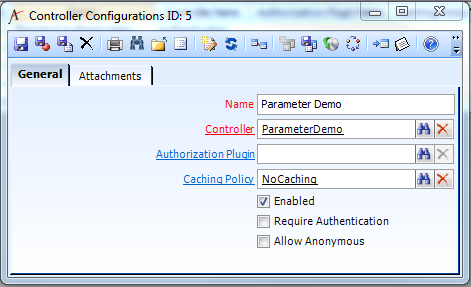
- Open a new record in the Controller Configurations service (also found in the Web Services application) and complete the information on the General tab:
- Name: Enter a name for the Controller Configuration.
- Controller: Enter the Controllers record you created above.
- Authorization Plugin: If required, select an authorization plugin to provide authorization with this controller.
- Caching Policy: Select the Caching Policy for the controller, either Nocaching (not cached) or YearCaching, which is a timecache policy.
- Require Authentication: If checked, then the controller requires a valid authentication token when called. If unchecked, then the controller can be called without any credentials.
- Allow Anonymous: If checked, anonymous users can access the endpoint.
- Save and close the Controller Configurations record.
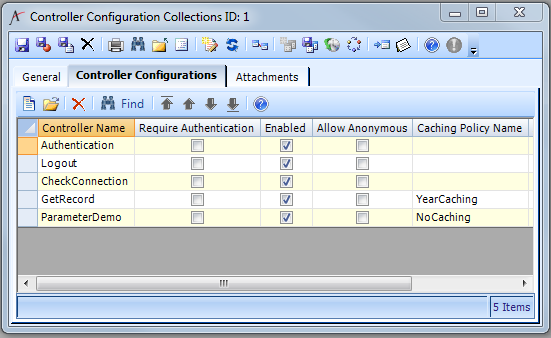
- Add the Controller Configuration you just created to a Controller Configuration Collection, which is another service in the Web Services application. You can use a collection to group together controllers with common settings. By default, Aptify includes one collection (the Aptify Web Collection).
- You can define a caching policy and authorization plugin at the collection level. However, any value you specified on the Controller Configuration record will override the collection’s settings for that particular controller.
- If you create your own collection, you need to add it to a Service Application in Aptify metadata.
You can now call your endpoint from Aptify SOA. Here are the settings that would be used for the sample controller shown in the example above.
Headers
No header required for this sample since the Require Authentication option is not checked.
Sample Parameters
This endpoint accepts a single parameter passed as 'param1'.
| Parameter | Query Param? | Description | Example |
|---|---|---|---|
| param1 | Yes | This parameter is send as response to user | test |
https://<service base>/ParamDemo/test
Parameter with value:test
HTTP Status Code
| Status Code | Meaning |
|---|---|
| 200 | OK; View data in response body |
| 404 | Unauthenticated |
Related content
Copyright © 2014-2019 Aptify - Confidential and Proprietary