Using Aptify SOA with Postman
- Andrew.Crispino (Deactivated)
This topic contains step by step instructions for how to use Aptify SOA with Postman.
Getting Started
Before you start, you need to download:
This will allow you to make calls to your server and help demystify the SOA layer.
Now, to create an environment follow the steps given below:
- Open Postman.
- Click 'Import' button located on top bar.

Navigate to the location of the collection file by drag and drop method or browse the files.
Expected Result
The success message will be displayed.
- Click '
Manage Environments'.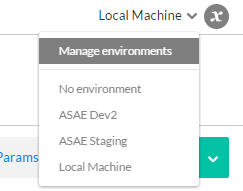
Add a new environment with any name and the following key and value as given in below table:
Key
Value
BaseServiceURL https://[name of the server you are installing the SSO on]/AptifyServicesAPI/services 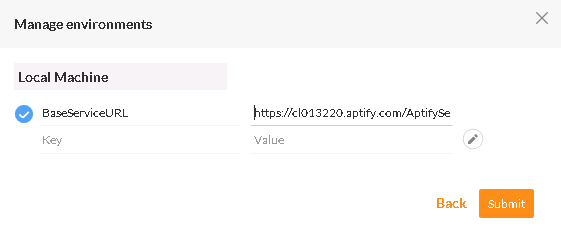
Click Submit
Expected Result
The new environment will be created.
- Now, select that environment so that BaseServiceURL in the call URL will be replaced by the environment created.
- In 'Preferences', go to Settings → Language Detection →
JSON.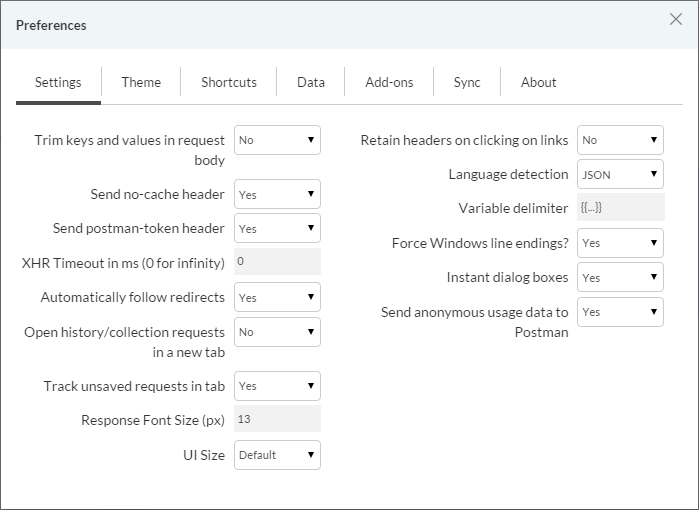
Postman is nice enough to send the token for us in any request made after logging. When you start making calls through code (JavaScript, .NET or anything else) then we need to manually add the token in the header.
When token is not passed automatically
Sometimes Postman does not pass the token automatically. In these cases you will need to manually add the token to all requests as given below:
Header Name: AptifyAuthorization
Header Value: Authentication Provider (SQL, Domain, etc.) and the token separated by a single space.

Configuring Web Users
If you want to use web users instead of the usual 'sa' user, follow the instruction given on Configure Web User Authentication page. Ensure that you change Username and Password on the login call.
Creating views for testing
If you have the Configuration Migration Tool installed in your system you can just unpack the metadata pack and skip this part.
For manual installation follow the steps given below:
Prompted View
Under the Persons service, create a Prompted List View which expects:
- FirstName and LastName - Call the View 'Find People SOA'
Service Data Object
For more detail explanation on how to create SDO's click here.
- Create a new database object with the following details:
- Name: spSearchCompanyByID
- DB: Aptify
- Type: Stored Procedure
SQL:
CREATEPROCEDUREspSearchCompanyByID (@IDbigint)ASSELECTID,NameFROMCompanyWHEREID = @IDGrant SQL:
GRANTEXECUTEONspSearchCompanyByIDTOEndUsers
Create a new service data object with the following details:
Name: spSearchCompanyByID
- SQL: spSearchCompanyByID
- Under Parameters create one record
- Name: ID
- Is Required: Checked
Service Process Flow (SPF)
For more info about SPF click here.
- Create a new process flow with the following details:
- Name: Create Contact Log
- Input Properties:
- EntityID - Long, not required, default: 1006
- RecordID - Long, required
- Description - String, required
- Result Codes:
- SUCCESS
- FAILURE
- Add a stock 'Create Contact Log' component
- Description: Context Object - Description
- CategoryID: Static Value - 1
- On the Output Map tab:
- GEObject: Context Object - ContactGE
- Add a stock 'Create ContactLogLink' component
- ParentGEObject: Context Object - ContactGE
- EntityID: Context Object - EntityID
- AltID: Context Object - RecordID
- Action Map tab: Change both to 'End Process' and set the Process Flow result accordingly.
- Link 'step d' to the 'step e' on Success.
- Set the failed result to end process in 'step d'.

- Save the process flow.
- Navigate to Web Services > Service Process Flows.
- Create a new SPF with the following details:
- Name: Create Contact Log
- Process Flow: The one we just created (Create Contact Log)
- Save the new SPF.
Just in case, please restart IIS, before using Postman.
Related content
Copyright © 2014-2019 Aptify - Confidential and Proprietary