/
Defining Wizard Pages
Defining Wizard Pages
The details of a metadata wizard are specified in one or more pages. By default, the wizard moves through the pages in order as specified on the Wizards record's Pages tab, but as described below, you can also add conditional logic via process flows to specify a next page to display based on a user's action.
Follow these steps to add pages to the wizard:
- Open the Wizards record.
- Click the Pages tab.
- Click the New button in the toolbar to open a new Pages record.
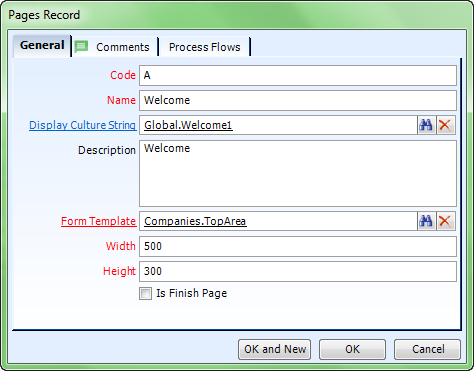
- Enter a Code for the page.
- This code can be referenced in process flows to determine which page to display based on a particular action. When assigning codes to steps, Aptify recommends that you assign the steps a letter in order (starting with A). See the Sample New Company wizard, which is included with Aptify, for an example of this convention.
- This code can be referenced in process flows to determine which page to display based on a particular action. When assigning codes to steps, Aptify recommends that you assign the steps a letter in order (starting with A). See the Sample New Company wizard, which is included with Aptify, for an example of this convention.
- Enter a Name for the step.
- This name appears in the wizard's step list (if the wizard is configured to display a step list).
- This name appears in the wizard's step list (if the wizard is configured to display a step list).
- Enter a Display Culture String for this step if localized users will run this wizard. The culture string you provide will be used to localize this step's name in the wizard's step list. See Using Localization Administration for more information on localization.
- Enter a Description of the step.
- Specify the Form Template that the wizard should use to display the content for this step.
- The form template contains the fields and text you want to display for a particular step. This field links to the Form Templates service.
- If you want to link a wizard page to an existing form template that is already used on a form in Aptify, create a copy of that template first and then link the copy to the wizard page. Also, use the Form Template Copy wizard to create a copy of the form template and its form template parts – do not clone the form template since this will not clone the linked form template parts and both templates will use the same parts, which can have undesirable side effects. See Using the Form Template Copy Wizard for information on how using the wizard.
- You can also create new Form Templates from scratch and then add fields and other parts using the Visual Designer (from the Form Templates record's Visual Designer tab). See Creating a New Form Template for details.
- You can also specify layout control logic on a page's form template to be used by the wizard. See Adding a Layout Control for details.
- Set the Width of the wizard page (or leave it at 0 to use the width from the specified Form Templates record).
- When greater than 0, this field specifies the width of the page within the wizard (in pixels). However, if left at 0, the system uses the default width from the Form Templates record instead. Note that if the wizard's width is set to 0, the widest step will set the width for the wizard.
- When greater than 0, this field specifies the width of the page within the wizard (in pixels). However, if left at 0, the system uses the default width from the Form Templates record instead. Note that if the wizard's width is set to 0, the widest step will set the width for the wizard.
- Set the Height of the wizard page (or leave it at 0 to use the height from the specified Form Templates record).
- When greater than 0, this field specifies the height of the page within the wizard (in pixels). However, if left at 0, the system uses the default height from the Form Templates record instead. Note that if the wizard's height is set to 0, the tallest step will set the height for the wizard.
- When greater than 0, this field specifies the height of the page within the wizard (in pixels). However, if left at 0, the system uses the default height from the Form Templates record instead. Note that if the wizard's height is set to 0, the tallest step will set the height for the wizard.
- You can specify this page as a finish page by selecting the Is Finish Page option.
- Enabling this option allows for more complex metadata wizard implementations.
- Enabling this option allows for more complex metadata wizard implementations.
- Enter any additional information on the Comments tab.
- Specify any process flows that should fire based on a user's action within the wizard (clicking Before, Next, Finish, or Cancel). See Using Process Flows to Add Functionality and Conditional Paging Logic for details.
- Repeat the steps above to add other pages to the wizard.
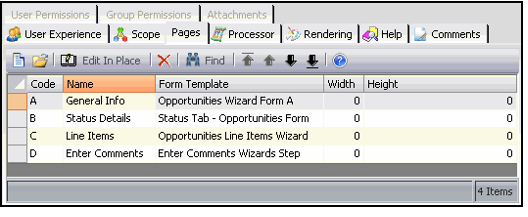
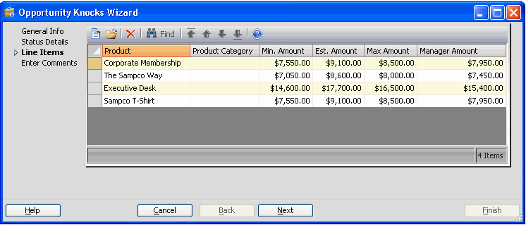
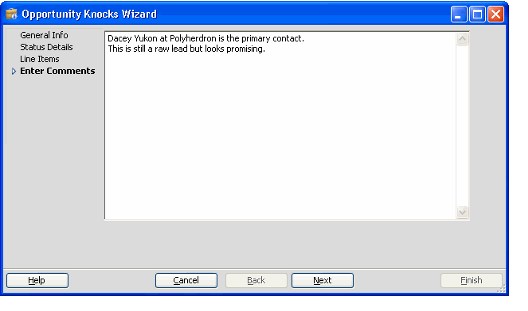
When finished, you should have a Pages record for every page of the wizard. In the example shown below, an Opportunity Knocks wizard that creates new Opportunities records has four pages (labeled A to D).
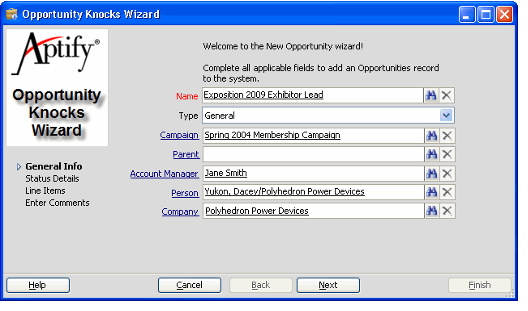
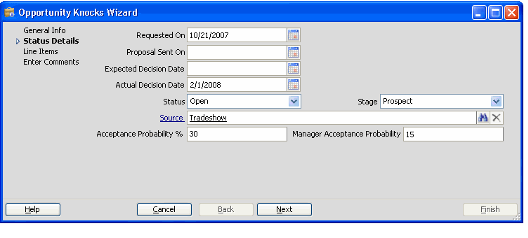
A user who runs this wizard sees the following pages:
- Page 1: Enter general opportunity information (corresponds to fields on the top area of the Opportunities form).
- Page 2: Enter Status details for the opportunity (corresponds to fields on the Opportunities form's Status tab).
- Page 3: Specify Line Items for the opportunity, if known (displays sub-type control for Opportunity Line Items sub-type).
- Page 4: Enter additional comments (added to Opportunities record's Comments tab).
, multiple selections available,
Related content
Defining Wizard Pages
Defining Wizard Pages
More like this
About the Wizards Form
About the Wizards Form
More like this
About the Wizards Form
About the Wizards Form
More like this
Creating the Wizards Record
Creating the Wizards Record
More like this
Creating the Wizards Record
Creating the Wizards Record
More like this
Designing Metadata Wizards
Designing Metadata Wizards
More like this
Copyright © 2014-2019 Aptify - Confidential and Proprietary
