/
Using the Aptify Button in the Desktop Client
Using the Aptify Button in the Desktop Client
- admin (Deactivated)
Owned by admin (Deactivated)
Last updated: Mar 12, 2018
The Aptify button is located in the upper left-hand corner of the Aptify Desktop client. It replaces the File menu seen in earlier versions of Aptify.
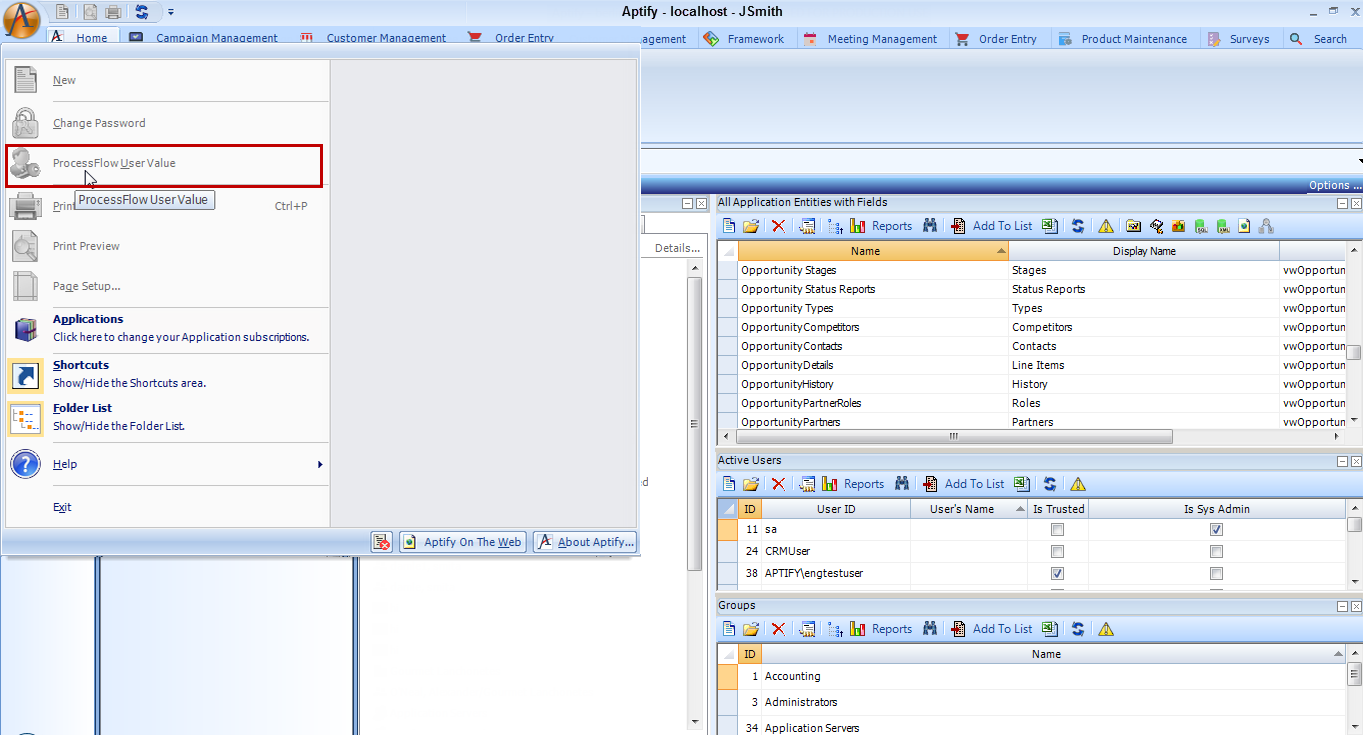
Clicking the Aptify button offers the following options:
- New: This option opens a new record in the currently selected service. (This option is grayed out if you have an application selected.) This provides the same functionality as the New button on the Quick Access Toolbar. See Using the Quick Access Toolbar for more information.
- Change Password: This option allows an untrusted SQL Server user to change his or her password within the Aptify interface. Note that this option is disabled for trusted users (who use Windows Integrated Security) and the sa user since it is not applicable to them. See Changing Your Password for more information.
- ProcessFlow User Value: Only Admin and Developer has a rights to control the Process flow with the different options. Once you designed and constructed your process flow, you can use the Process Flow Debugger tool to test it.
- ProcessFlow Debugger Scope Off: The debugger tool is turned off for all process flows runs from an Event Handler.
- ProcessFlow Debugger Scope All: The debugger tool will be launched for all Process Flows that are fired from an Event Handler.
- ProcessFlow Debugger Scope Defined List: Only process flows selected from the ProcessFlow List will launch in debug mode.
- Page Setup: This option allows you to set up the view's print options.
- Print Preview: Displays the view as it will appear when printed. Note that if printing a list view that has multiple pages, only information from the currently displayed page is printed (therefore, only information from the currently displayed page appears in the preview).
- Print: This provides the same functionality as the Print button on the Quick Access toolbar. See Using the Quick Access Toolbar for more information). Note that if printing a list view that has multiple pages, only information from the currently displayed page is printed.
- Applications: Select this option to open the application selection dialog See Adding an Application and Removing an Application for more information. This option provides the same functionality as right-clicking the Home location on the Navigation Bar.
- Shortcuts: This option toggles the Shortcut Bar so you can add or remove it from the Desktop. See Using the Desktop Client Shortcut Bar for more information.
- Folder List: This option toggles the Folder List so you can add or remove it from the Desktop. See Using the Desktop Client Folder List for more information.
- Help: This option provides access to the Aptify on-line help documentation. See Using the Desktop Client Help Menu for more information.
- Exit: Closes the Aptify client application.
- Session Exceptions: This option opens the Session Exceptions viewer which records errors generated by Aptify during your current session. See Using the Desktop Client Session Exception Viewer for more information.
- Aptify On The Web: This option opens the Aptify home page in a Microsoft Internet Explorer window.
- About Aptify: This option opens a window that displays information about the version of Aptify that is currently running on the computer.
, multiple selections available,
Related content
Using the Aptify Button in the Desktop Client
Using the Aptify Button in the Desktop Client
More like this
Connecting to an Aptify Server Using the Desktop Client
Connecting to an Aptify Server Using the Desktop Client
More like this
Connecting to an Aptify Server Using the Desktop Client
Connecting to an Aptify Server Using the Desktop Client
More like this
Modifying AptifyAsyncProcessor.exe.config
Modifying AptifyAsyncProcessor.exe.config
More like this
Modifying AptifyAsyncProcessor.exe.config
Modifying AptifyAsyncProcessor.exe.config
More like this
Modifying AptifyAsyncProcessor.exe.config
Modifying AptifyAsyncProcessor.exe.config
More like this
Copyright © 2014-2019 Aptify - Confidential and Proprietary