/
Configuring the Web Browser Component
Configuring the Web Browser Component
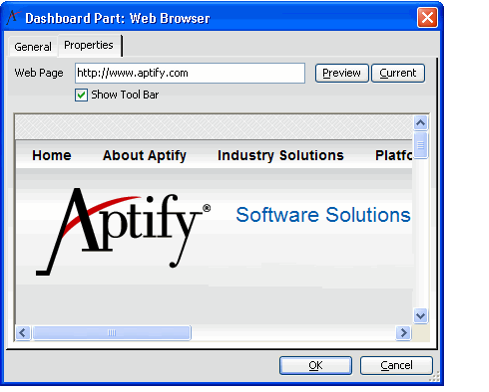
The web page specified on the Properties tab of the Dashboard Parts record displays in the dashboard part.
Follow these steps to add a Web Browser part to the dashboard:
- On the General tab of the Dashboard Parts record, select the Web Browser component from the Component field.
- Select the Properties tab.
- Enter the URL of the web page to display when the part is loaded in the Web Page field.
- Click the Preview button to display the Web Page you entered in the preview window (visible below the Show Tool Bar option).
- If you use the Preview window to navigate to a new web page, click the Current button to populate the Web Page field with the page that is currently displayed in the Preview window.
- Select Show Tool Bar if you want the browser toolbar to appear above the web browser when the part is loaded.
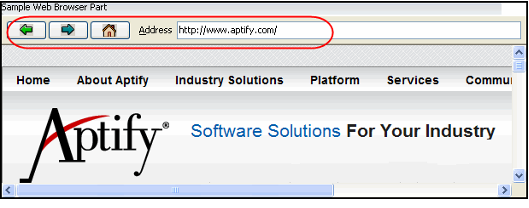
- The Web Browser's Tool Bar is shown in the figure below. It includes a Back button, a Forward button, a Home button, and an Address field for specifying a URL to load in the browser.
- The Web Browser's Tool Bar is shown in the figure below. It includes a Back button, a Forward button, a Home button, and an Address field for specifying a URL to load in the browser.
- Click OK to save the Dashboard Parts record.
, multiple selections available,
Related content
Configuring the Web Browser Component
Configuring the Web Browser Component
More like this
Adding a Dashboard Part
Adding a Dashboard Part
More like this
Adding a Dashboard Part
Adding a Dashboard Part
More like this
Configuring Dashboard Part Components
Configuring Dashboard Part Components
More like this
Configuring Dashboard Part Components
Configuring Dashboard Part Components
More like this
Deleting a Dashboard Part Using the Dashboard Part Options Menu
Deleting a Dashboard Part Using the Dashboard Part Options Menu
More like this
Copyright © 2014-2019 Aptify - Confidential and Proprietary

